fashion

ROAD TEST: I tried to tie-dye my clothes at home like an influencer. Here's precisely how it went.


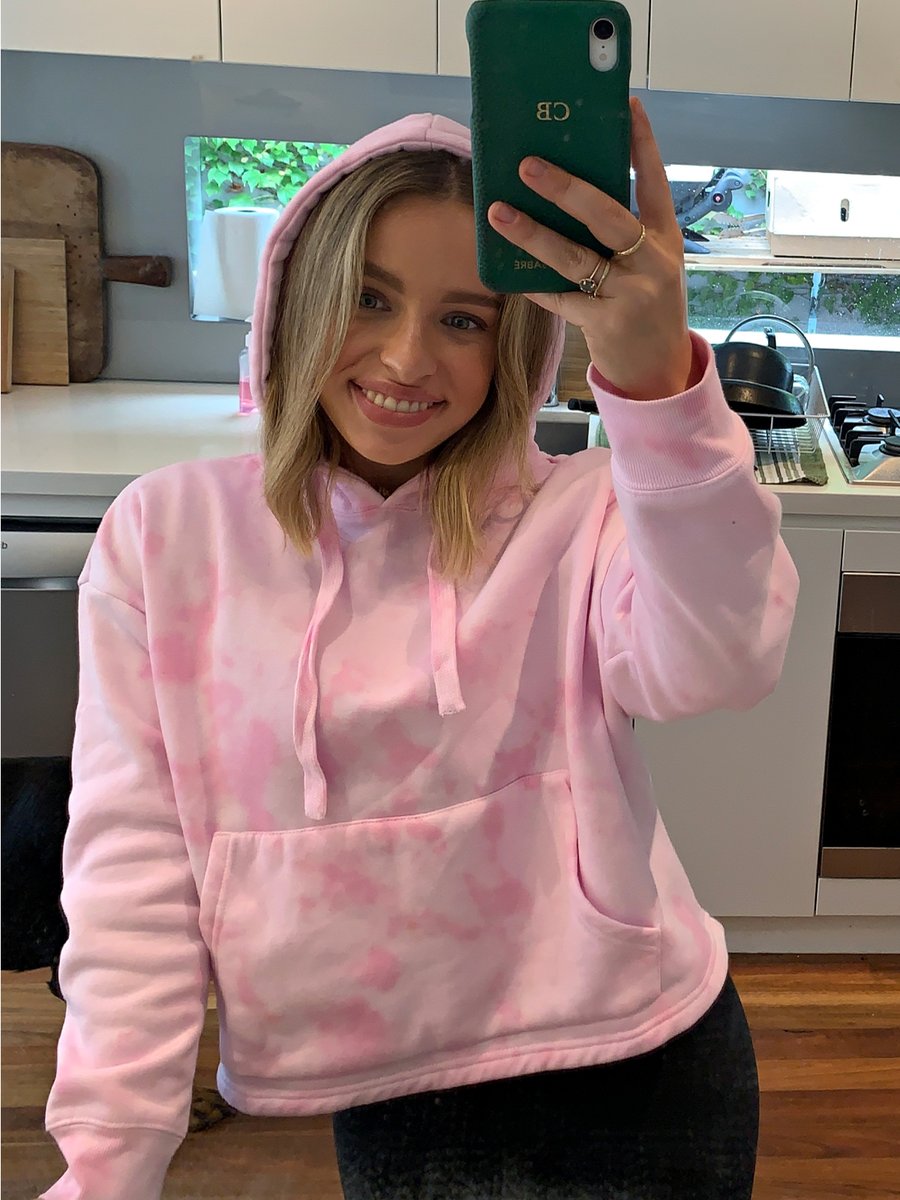
You may have noticed by now that tie-dye is well and truly back in fashion.

Before isolation, the trend was already being worn by stylish celebrities (think Kendall Jenner and Gigi Hadid) and popping up on international runways, but now that we’re all at home and trying out DIY activities, tie-dye is absolutely everywhere. Even Victoria Beckham recently gave it a go in the yard with her kids.

WATCH: Mamamia reviews non family friendly fashion. Post continues below.


Video via Mamamia


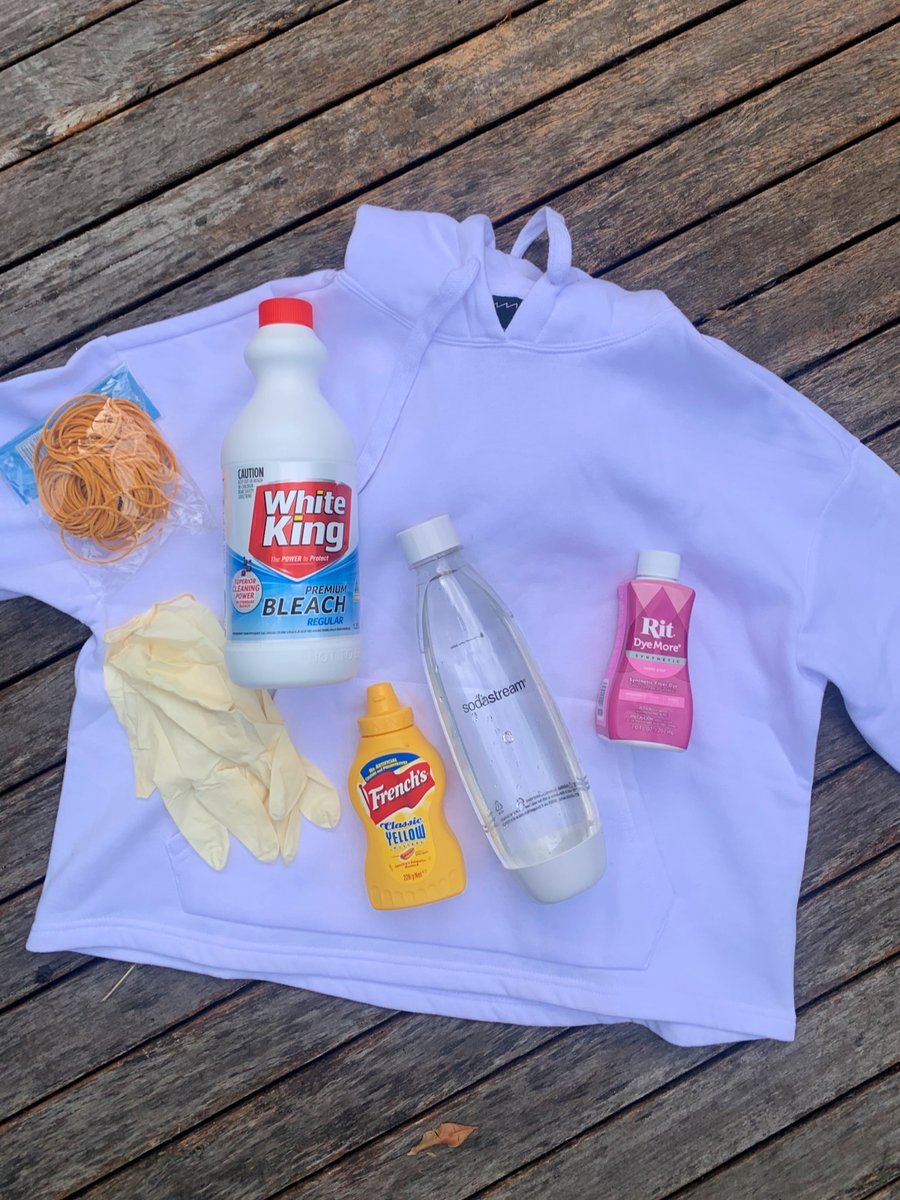
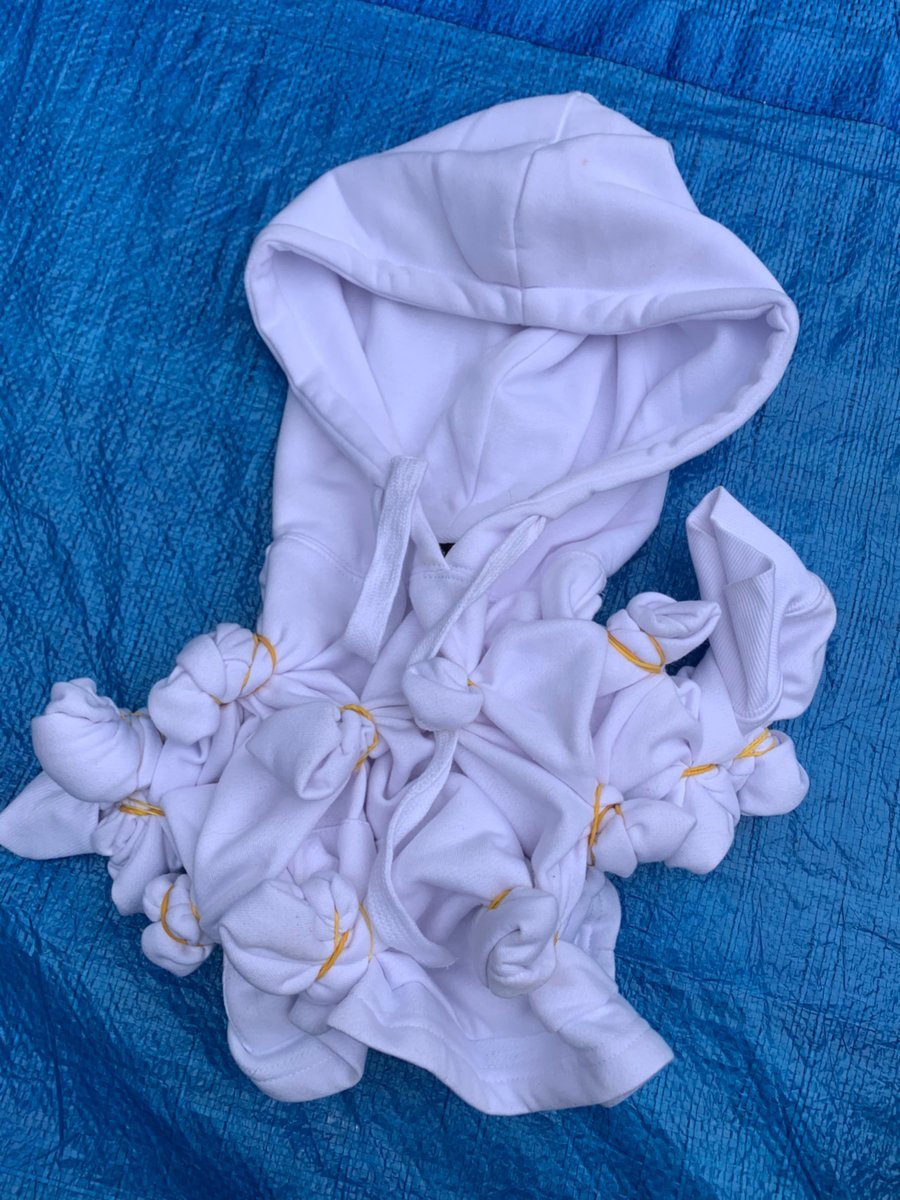
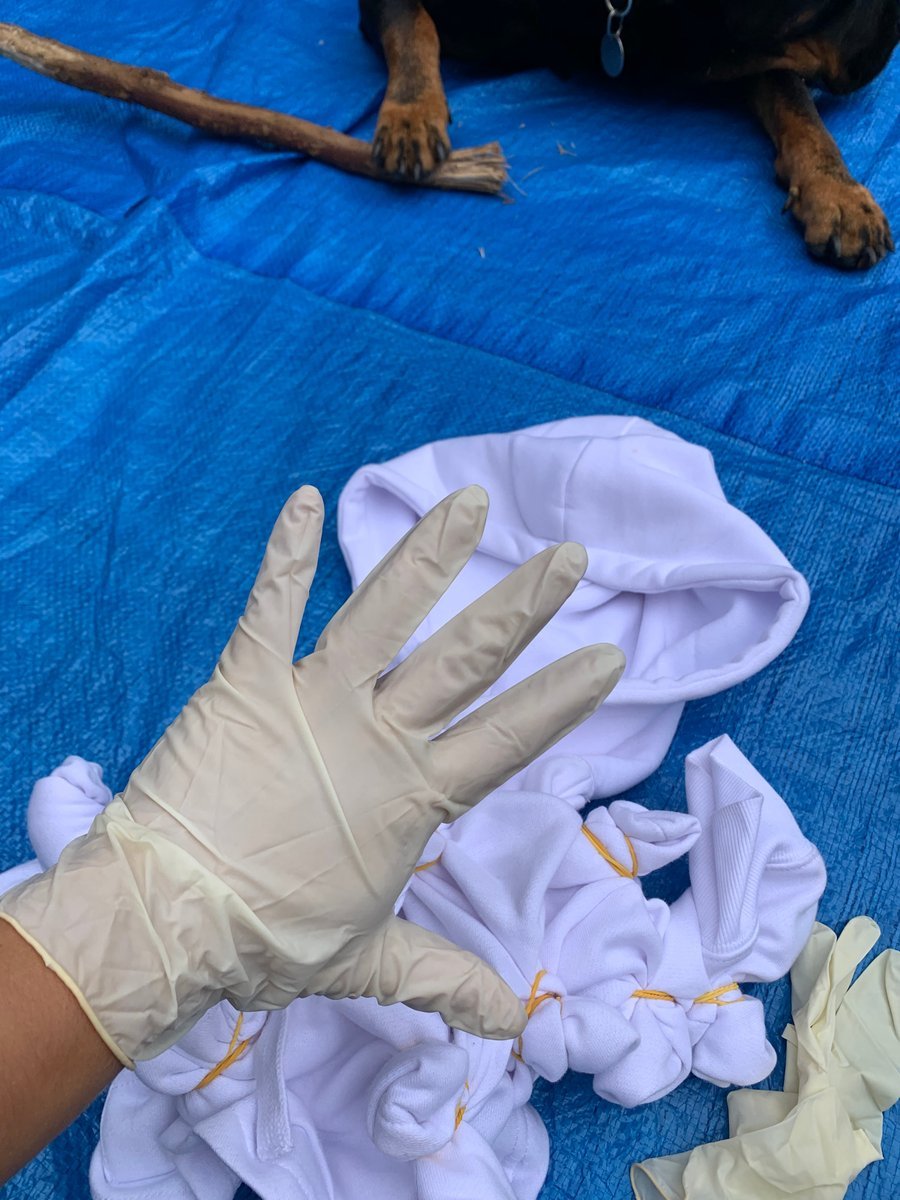
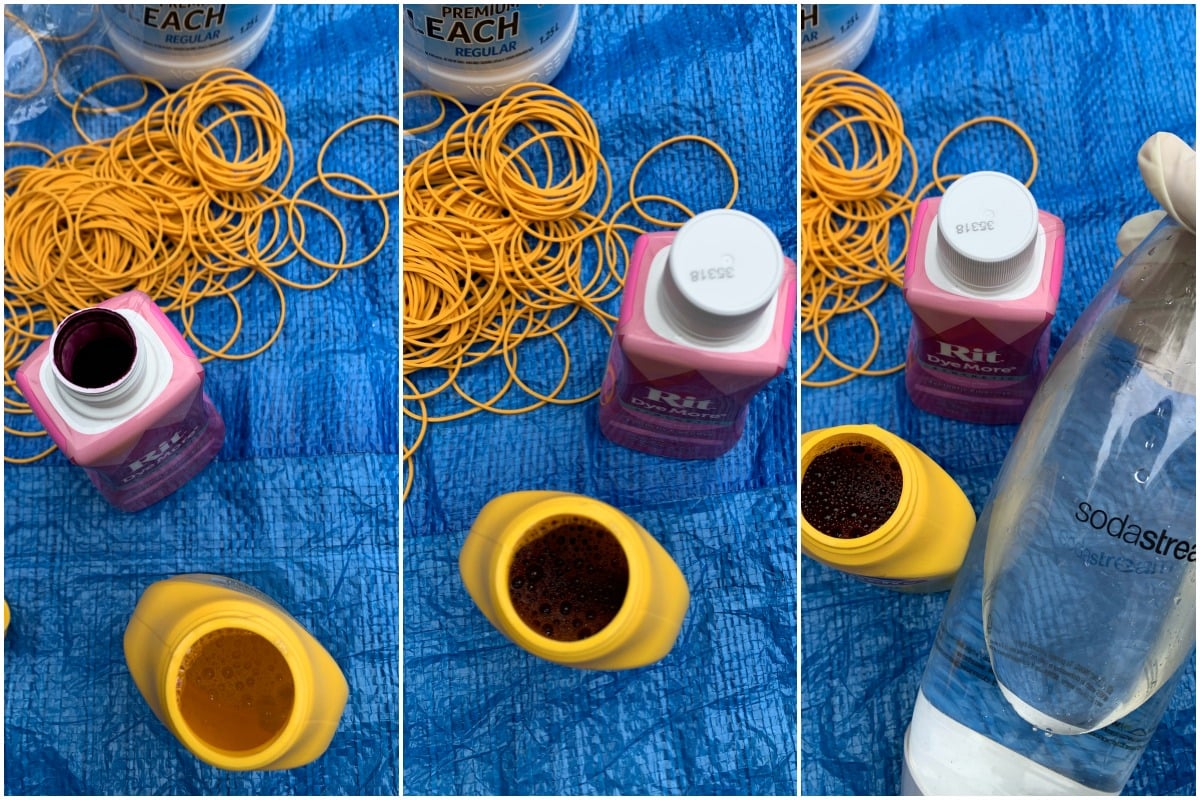
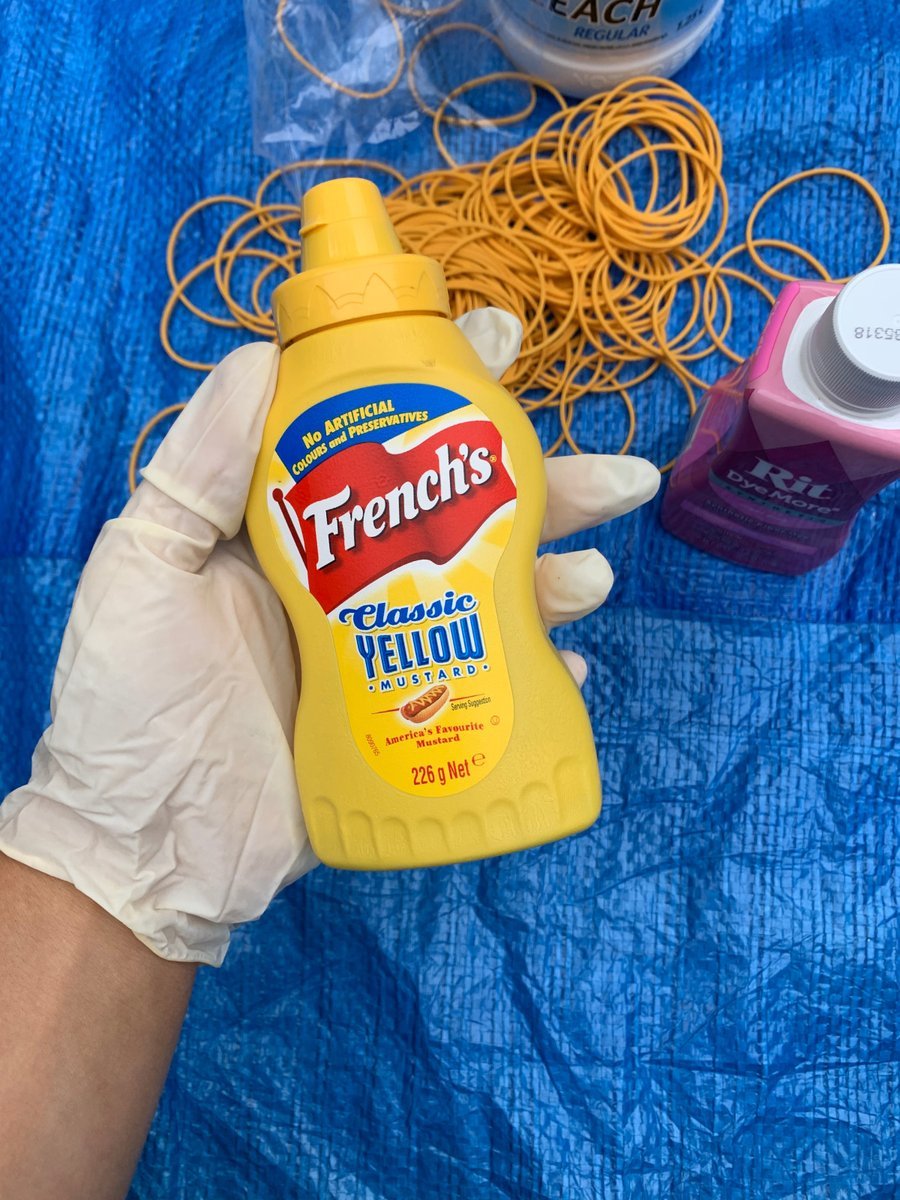
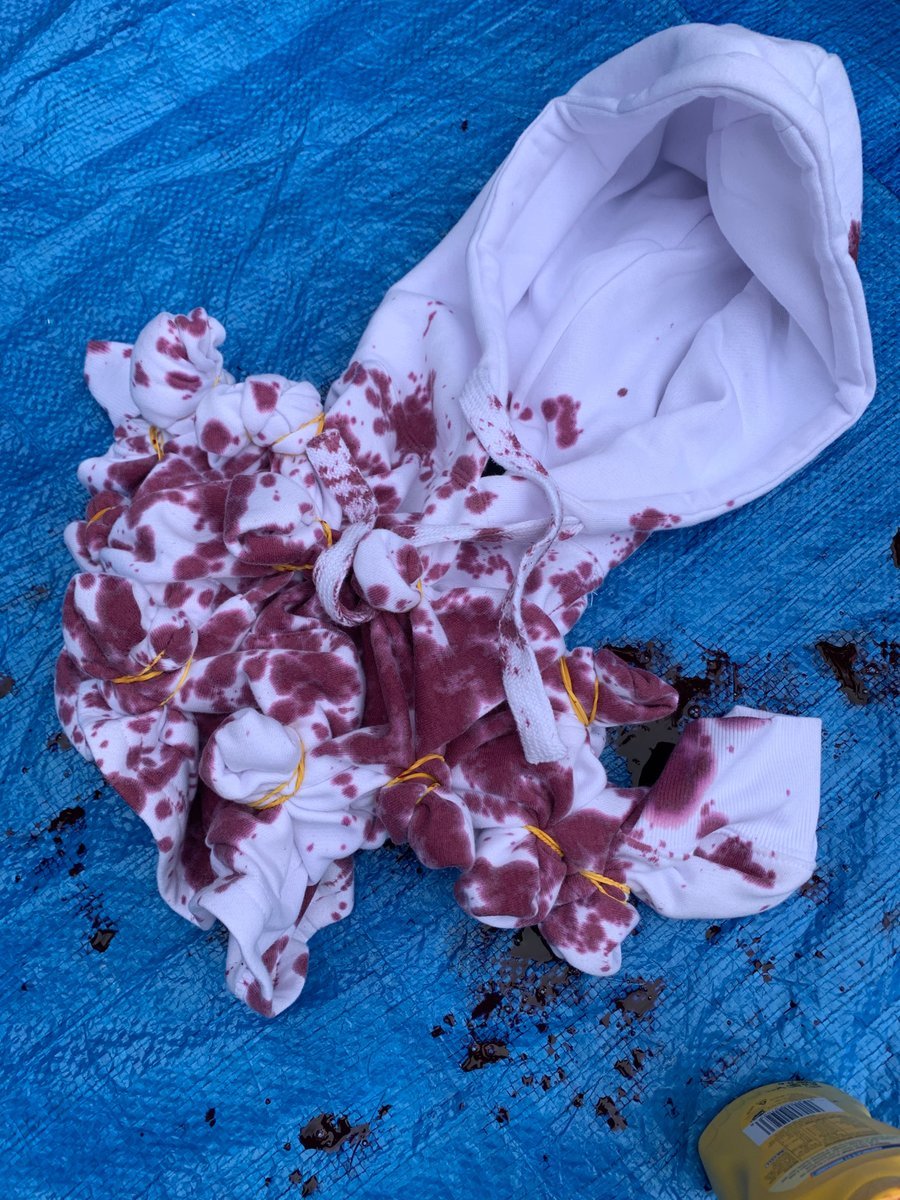
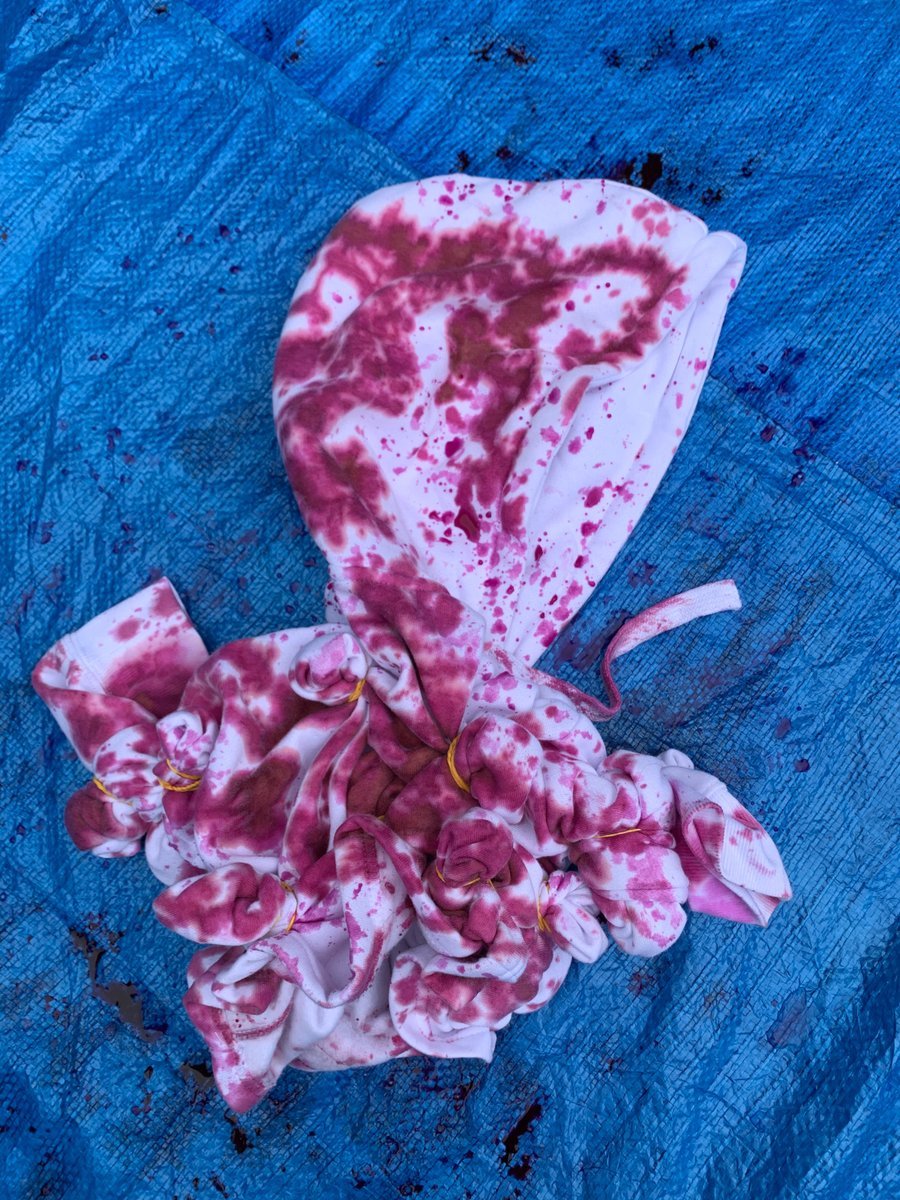
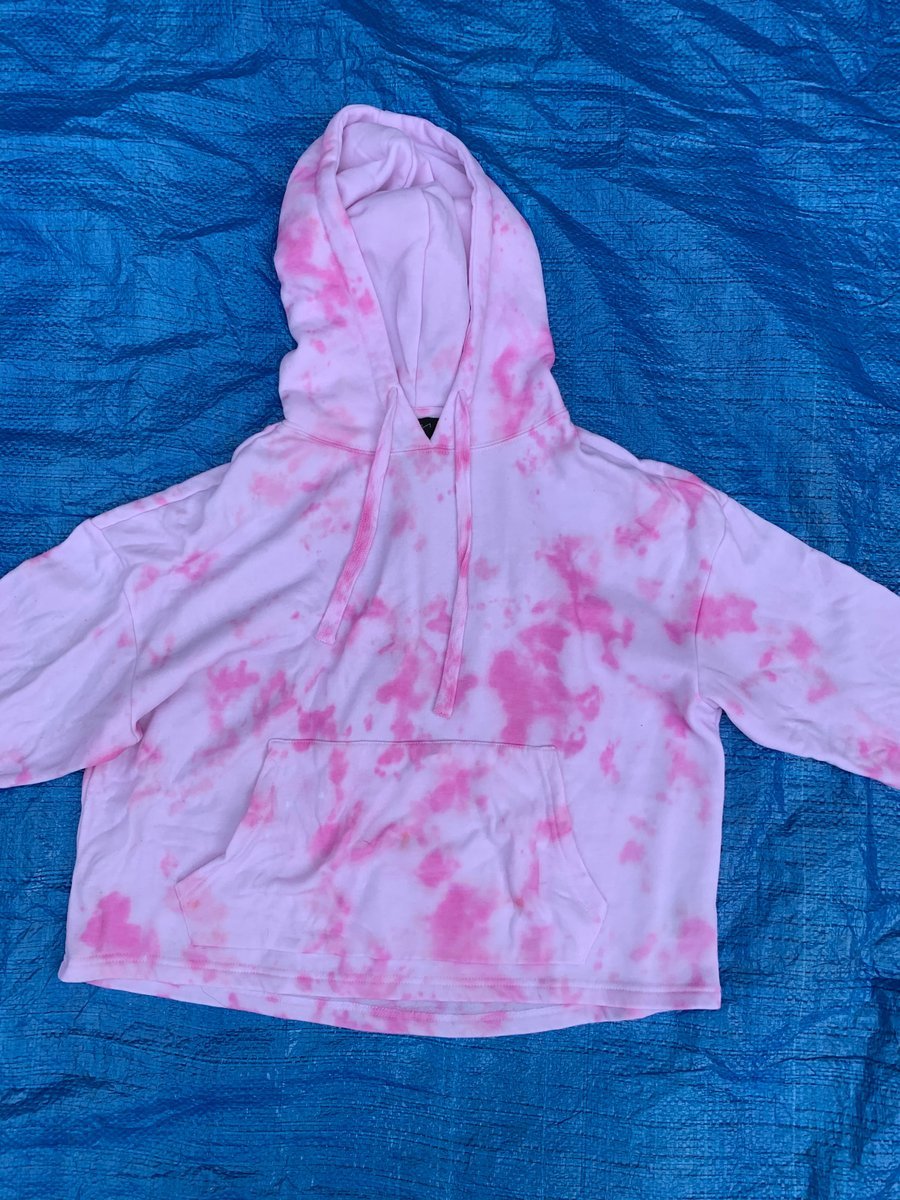
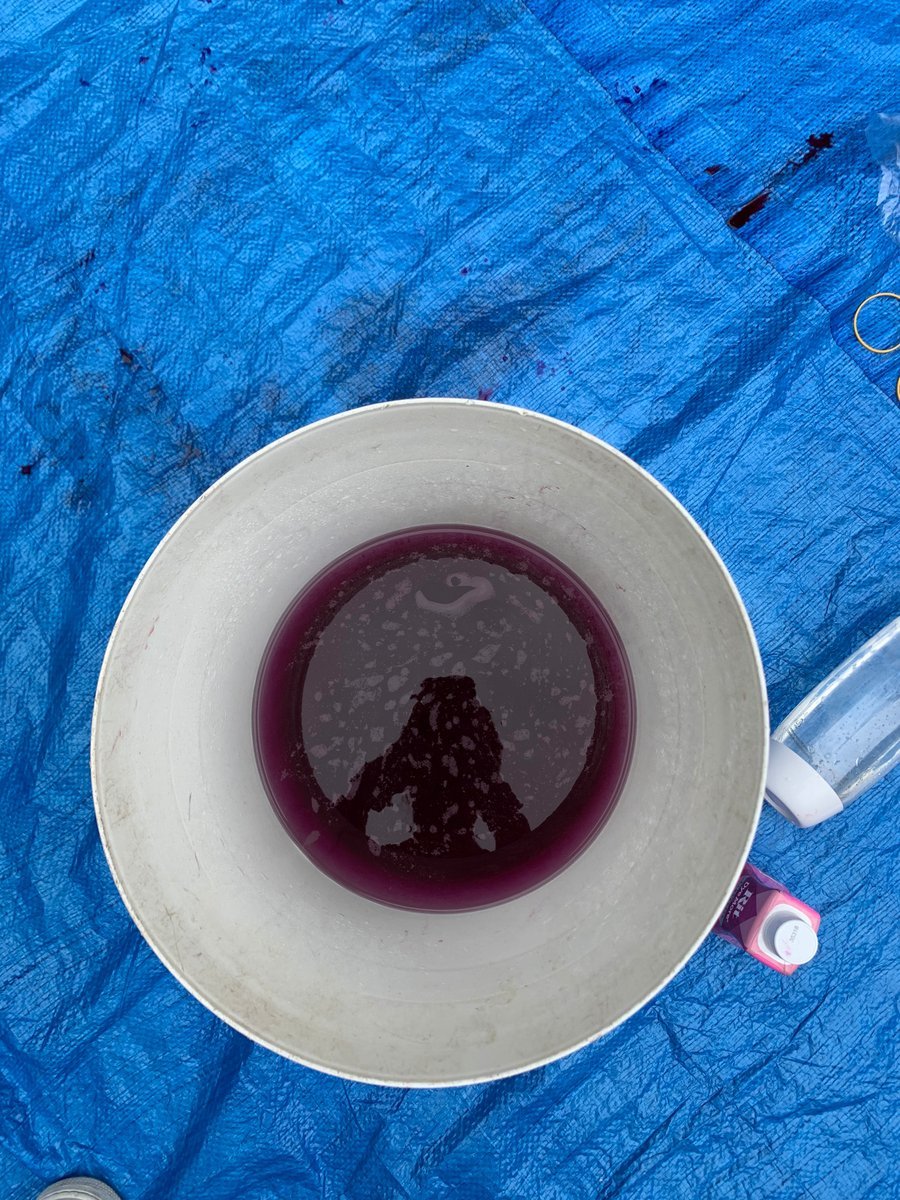
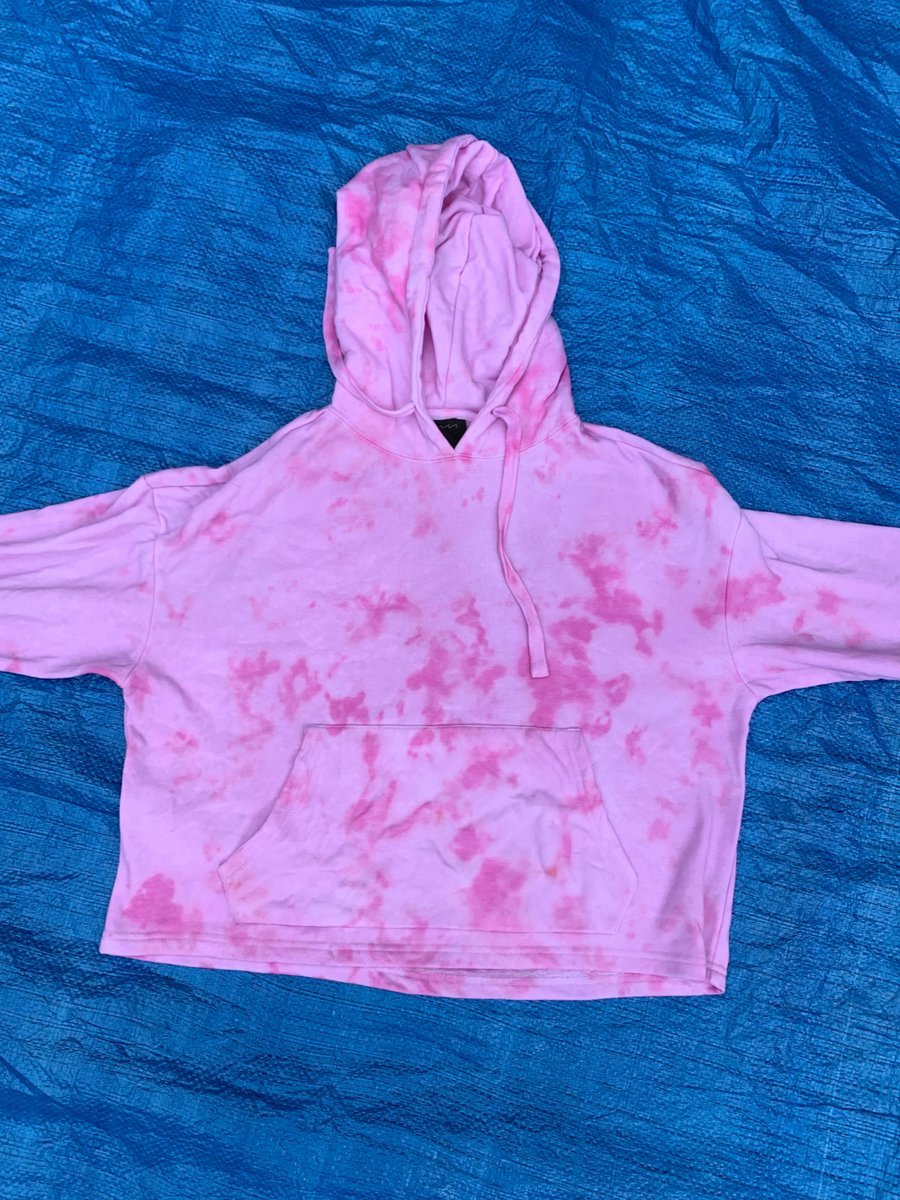
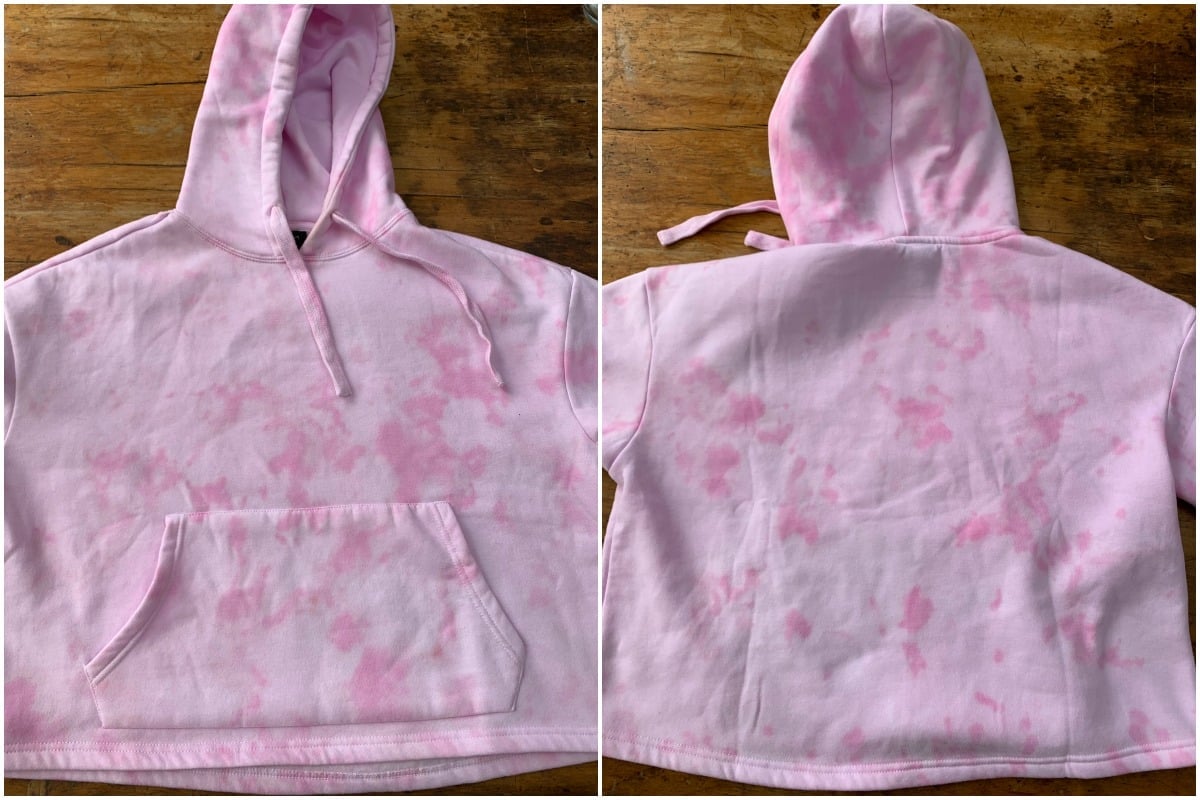
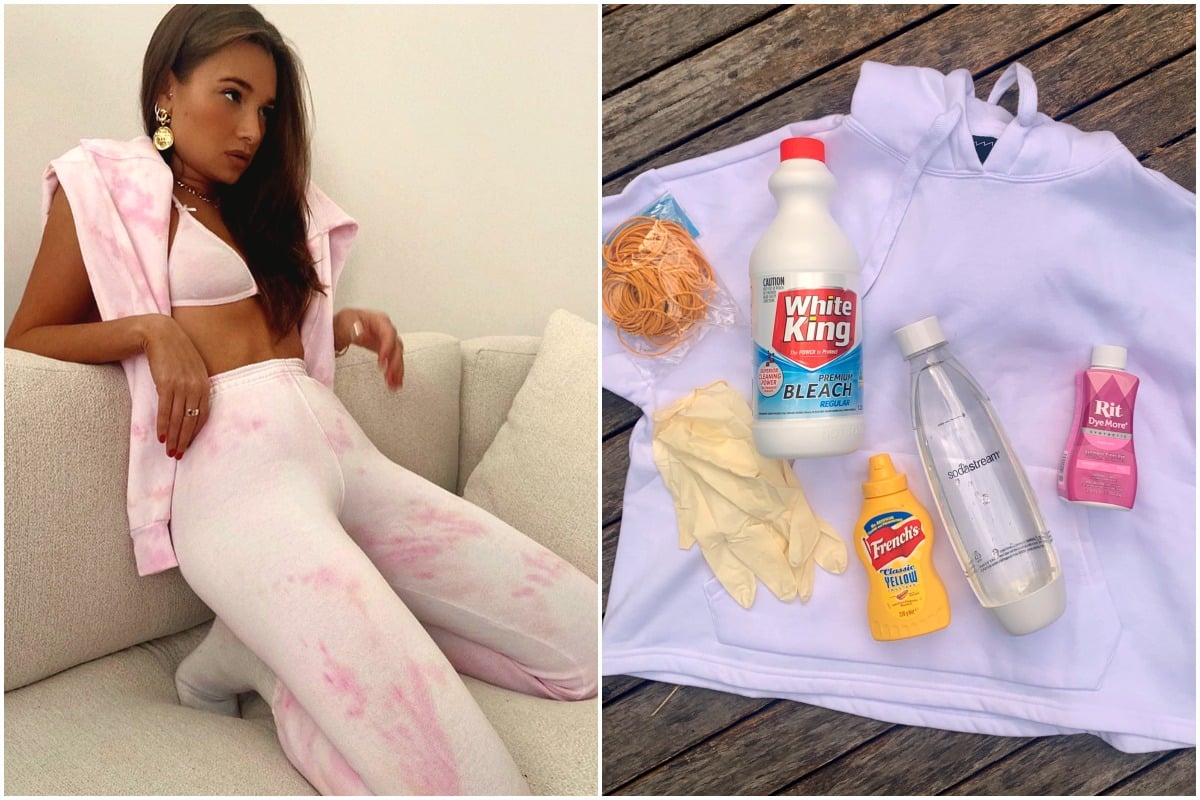
I spent ages considering whether to buy an overpriced tie-dyed hoodie, then changed my mind and thought – why not try it myself instead? I can choose the colours and it’ll be heaps cheaper.

Thankfully for me, New York-based influencer Danielle Bernstein, who I’ve been following for years, decide to give it a crack too and document the entire thing on her stories.


View this post on Instagram


My very dysfunctional tie-dye DIY tutorial is now in a highlight haha • but this subtle nude creation is cute, no?!

A post shared by  Danielle Bernstein (@weworewhat) on

ADVERTISEMENT


So I thought, screw it. I won’t bother researching, I’ll just buy everything she used and follow her steps.

Great idea.

So from a girl who isn’t particularly DIY savvy, here are Danielle’s steps on how to tie-dye at home and all the photos of exactly how my jumper turned out after following them.

Products you will need to tie-dye at home:

product-shot
Image: Supplied.
ADVERTISEMENT
  • A white jumper 
  • Dye
  • Rubber bands
  • Bleach
  • Gloves
  • A squeeze/squirt bottle (I couldn't find any so I poured out a sauce bottle and washed it out before using)
  • Water
  • A tarp or something to put down first so you don't get dye and bleach everywhere.
  • A bucket

Step 1: Twist pieces of the jumper and tie with rubber bands.

knots
Image: Supplied.
ADVERTISEMENT

The technique Danielle suggested was to place your hand inside the jumper, twist a section into a rosebud-like shape and tie a rubber band around it. Repeat as needed, making sure you do the front, back and arms too.

Step 2: Put on gloves.

gloves
Image: Supplied.
ADVERTISEMENT

Self-explanatory but so bloody important.

Step 2: Pour bleach, dye and water in the squeeze bottle.

STEPS
Images: Supplied.

Danielle wanted hers to look really light so she added bleach to the mix. I did too.

ADVERTISEMENT

I poured the bleach about a third of the way - you can add more or less, it depends how much you want that washed-out bleached effect. Then pour in a small amount of dye (probably around 30mls) and water to dilute it.

Step 4: Shake and randomly disperse on the jumper.

SHAKE
Shake! Image: Supplied.
first-lot-of-dye
First lot of dye. Image: Supplied.
ADVERTISEMENT

Step 5: Wash out the bottle and add dye and water only.

second-lot-of-dye
Second lot of dye. Image: Supplied.
ADVERTISEMENT

This time, to add another layer of pink and give the effect of different levels of dye, put the same amount of dye and only water in the bottle. Shake it up and disperse on the jumper again.

Step 6: Place in the washing machine.

Put the jumper in the wash on a COLD 15-minute rinse cycle and once done, remove the rubber bands.

After-wash-one
Image: Supplied.
ADVERTISEMENT

Here is it just after the wash.

Step 7: Dunk it in a bucket of water and dye.

BUCKET
Image: Supplied.

This step in the tutorial is optional. Danielle decided to dunk her jumper in a bucket of dye and water to get a wash of colour over the jumper. However, if you prefer the contrast between the dye and white, just leave it to dry.

ADVERTISEMENT

If you want to follow this step, get a bucket and fill it up with water. Pour some dye in it and swish it around. Then, dunk your jumper in it for a few seconds.

Then, leave it outside in the sun for a few hours. I left mine for three hours.

After-wash-two
Image: Supplied.
ADVERTISEMENT

Step 8: Put in the washing machine, again.

Once that's all done, I decided to wash mine on a COLD quick wash for 30 minutes.

Here is the end result!

Images: Supplied.
IMG_7022-1
Image: Supplied.
ADVERTISEMENT

Final verdict: I'm really happy (and surprised) with how it turned out! Next time, I probably wouldn't have been so cautious with the dye because it's supposed to be a bit messy in order to get more of those dark clumps of dye.

Other than that, I love the bleach effect and would definitely wear it out in public.

Now, I just need to decide which colour to try out next.

Are you going to try out this tutorial? If you do, let us know how you go in the comments.

Feature image: Instagram/@weworewhat and supplied.