beauty

'I’m over 50 and here are my 10 rules for doing my makeup.'

It’s no secret that I love makeup. It’s my happy place that sets me up for each day. One thing I've noticed over the years, however, is just how much our skin changes as we age — and that can obviously affect how our makeup looks. 

And the thing is, it can be really confusing knowing how to navigate the makeup game as you hit your 40s, 50s and beyond.

Watch: Bridal Makeup Artist Natalie Wright teaches us her techniques for a smokey eye with a twist... there's no black eyeshadow in sight. Post continues below.


Video via Mamamia

Meaning? I regularly get asked for tips or advice from women on how to approach makeup as you age — what products they should use (and the ones they should avoid), the best techniques to use, etc. etc.

It's important to keep in mind that makeup is very much a 'you do you' thing, and everyone should do whatever makes them feel most confident — no matter what your age.

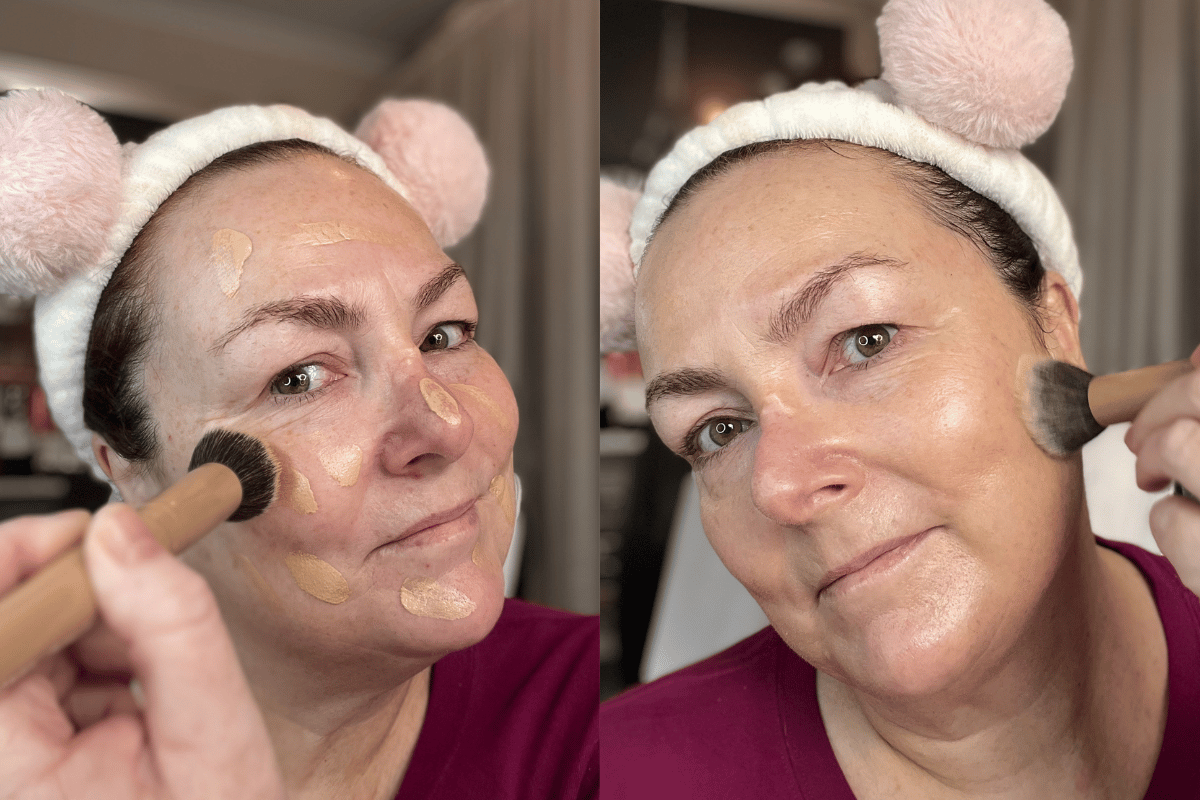
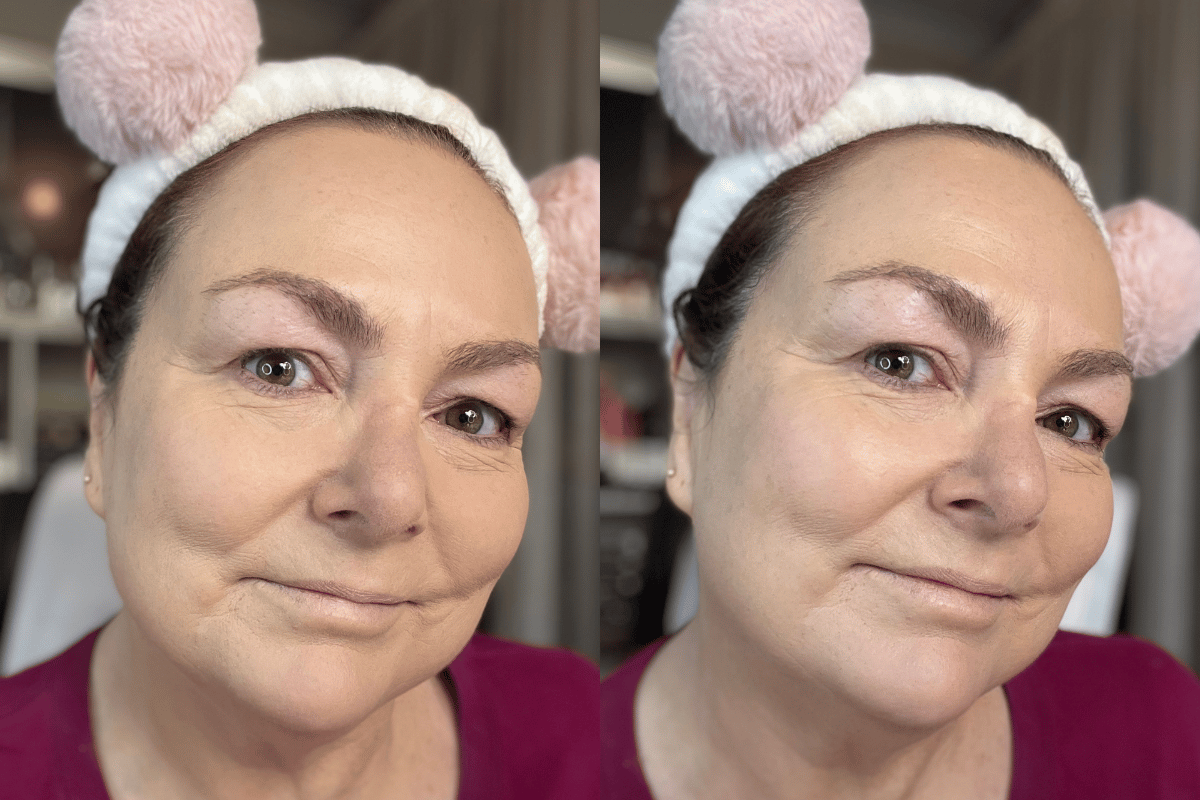
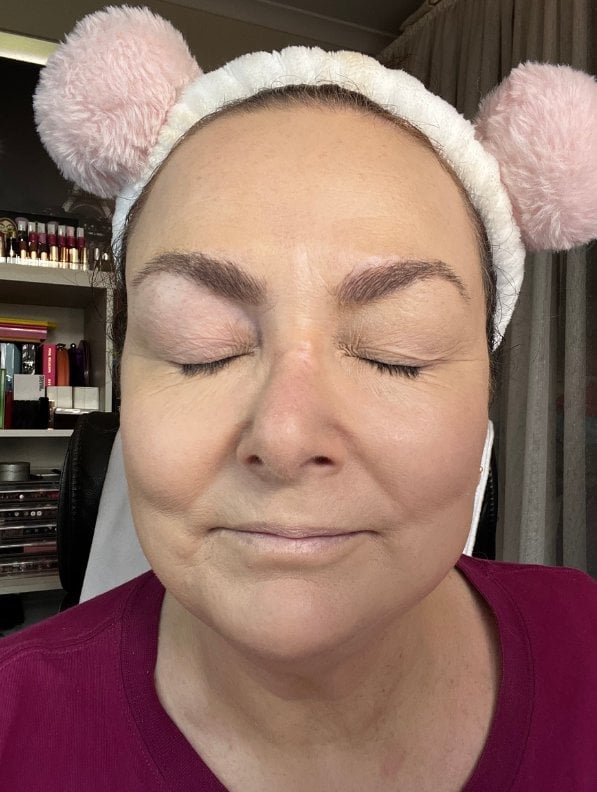
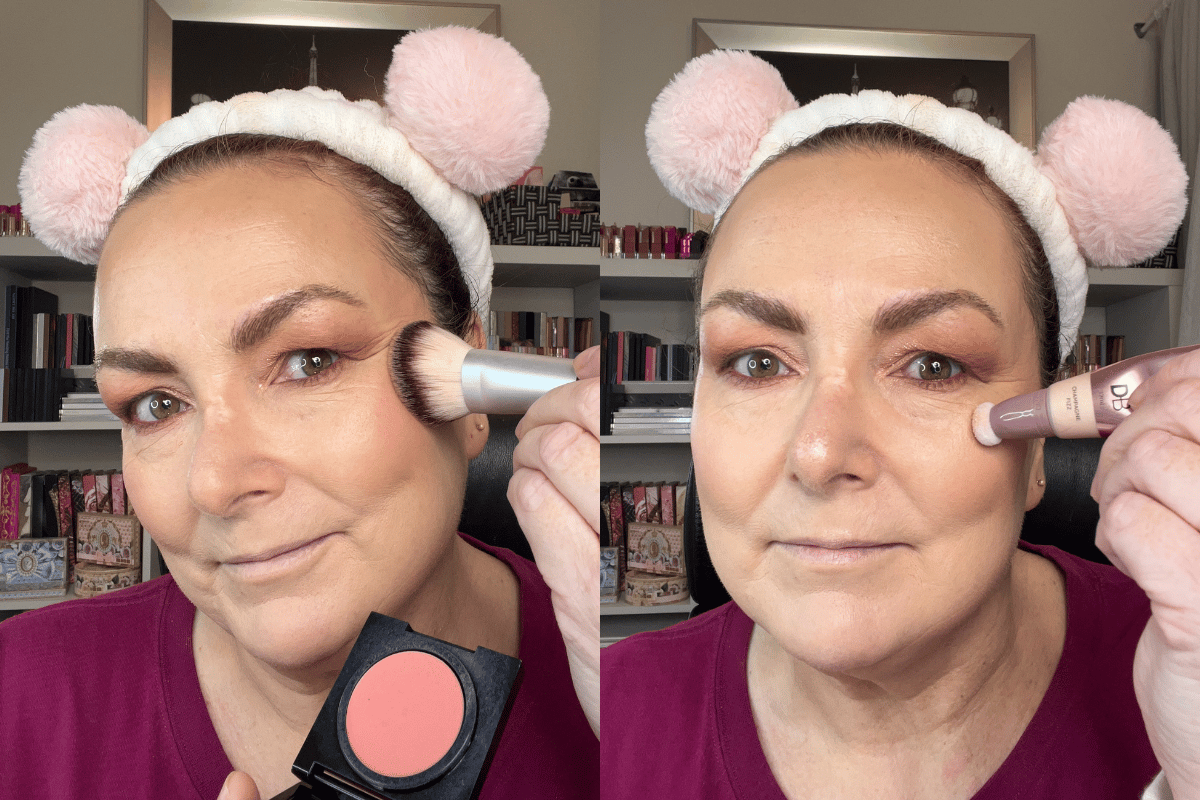
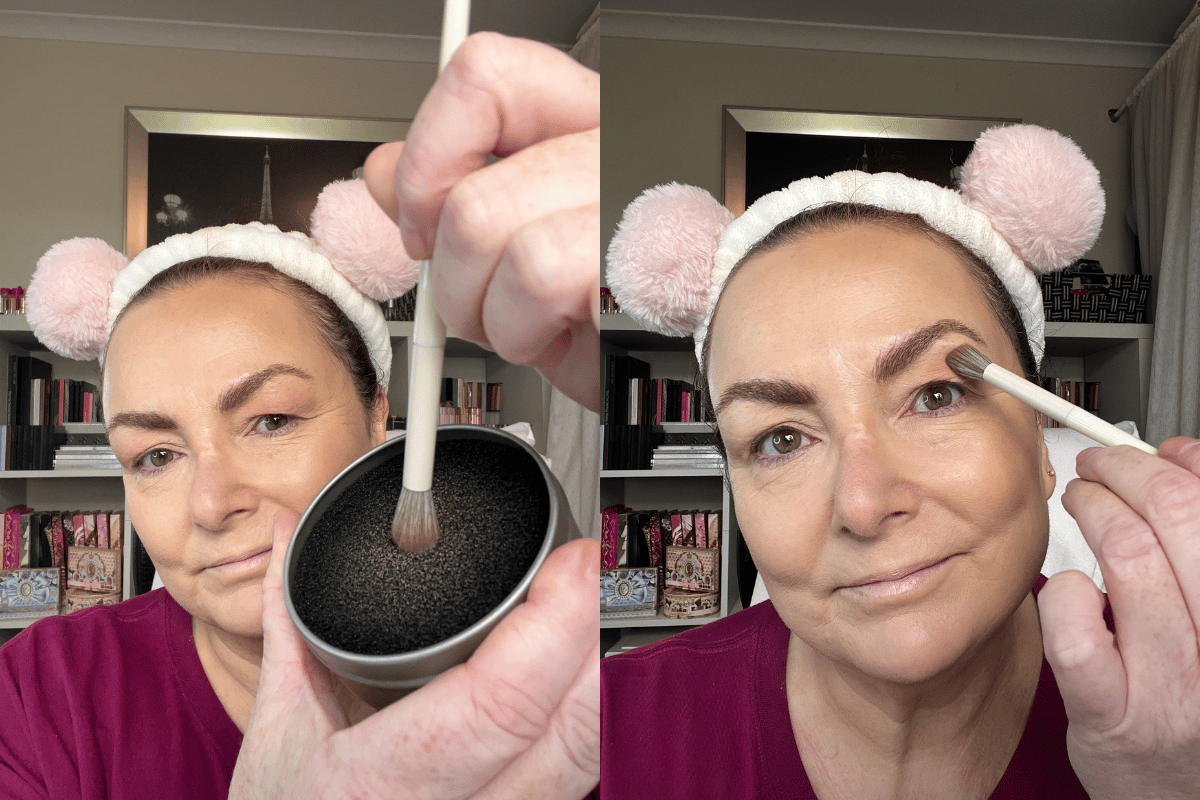
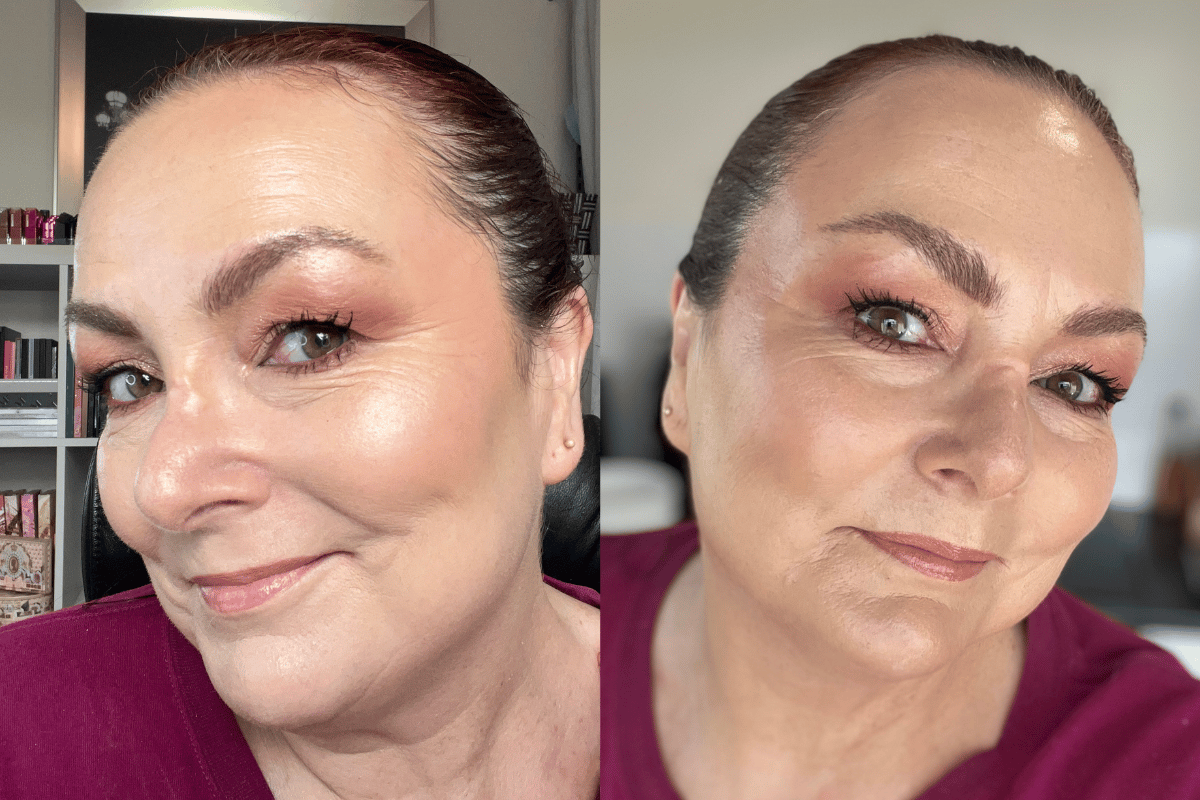
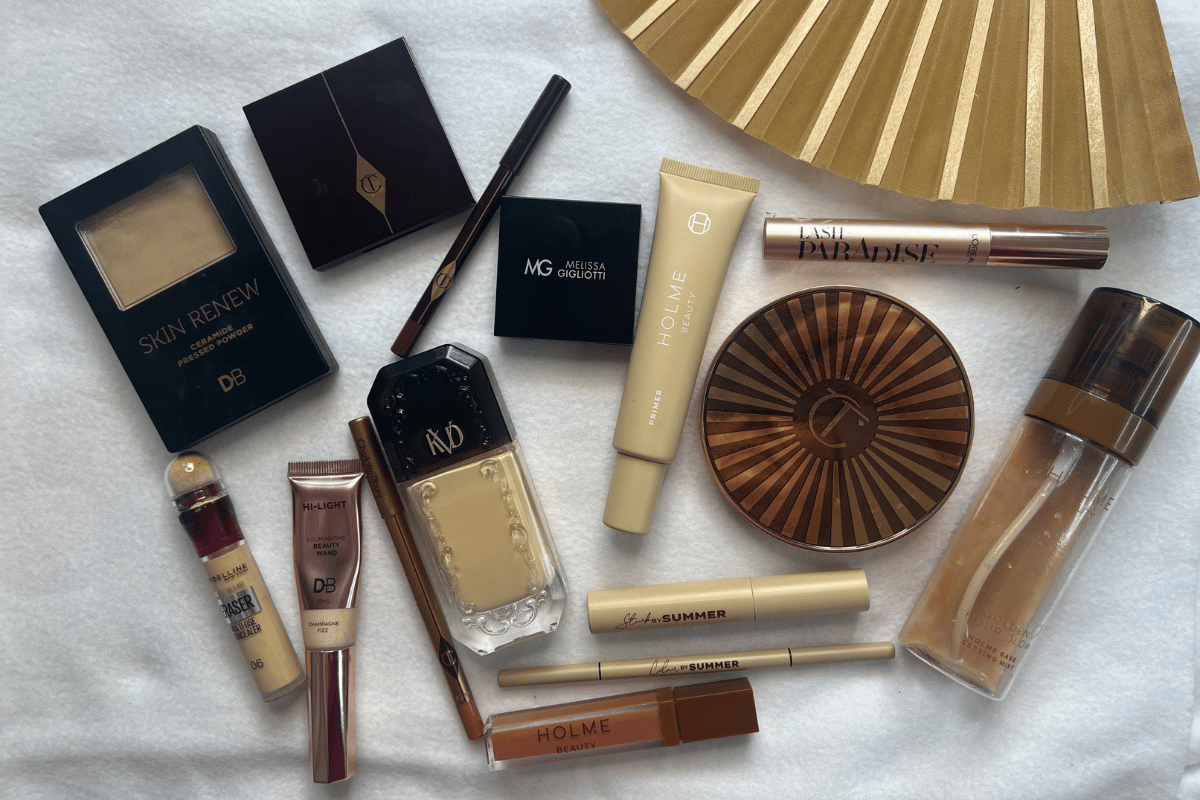
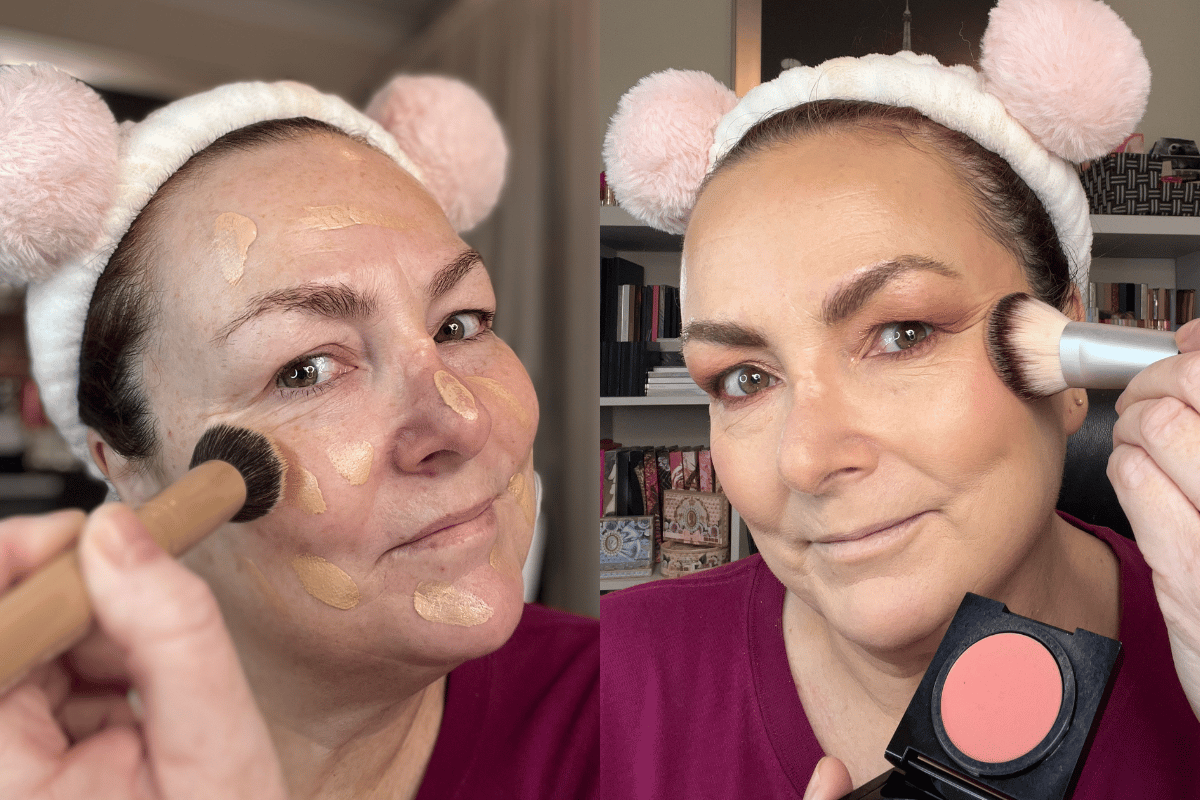
But if you're looking for how you can elevate your look with a few simple tips, I thought I'd pull together a helpful list of the makeup 'rules' I like to use.

ADVERTISEMENT

1. Skin prep is key.

You can use the most expensive, beautiful, highly rated makeup in the world but if you don’t get your skin sorted first, then it's all for nothing. 

You wouldn’t paint your walls without first washing them down and sanding any rough surfaces. So, get yourself a dedicated skincare routine and be consistent with it. 

2. Illuminating primers are your friend.

As we age, our skin can begin to look dull and lacklustre, which can make us look older. This is where illuminating primers com in - they'll add a hint of radiance back into your skin and help you achieve a more youthful glow. 

I love how they also work to reflect light, giving a beautiful soft and diffused look to your skin. If you don't have some in your kit already, I highly recommend giving them a go.

Image: Supplied.

ADVERTISEMENT

My current favourite? Holme Beauty Primer in 'Bang', $65.

3. Make your foundation juicy.

If you love the foundation you're using but find it looks a bit dull, heavy or drying, then there are a couple of easy tricks you can do to transform it. 

Firstly, you can simply add a few drops of hyaluronic acid serum to your foundation for instantly plump, hydrated skin with a natural finish. 

I also see a lot of women searching for a tinted moisturiser version of their favourite foundation for a lighter, more natural-looking finish. However, if you want to save yourself some money while still using a product you love, simply just mix a lightweight moisturiser in with your foundation.

4. Use a warmer foundation tone.

If you watched the subscriber tutorial I filmed with Holly Wainwright on how to get your glow back, you would know I always recommend going a shade warmer when choosing your foundation. 

That's because as we age, our skin thins and becomes less luminous — meaning it can end up looking a little ashy. 

Going a shade warmer will make you look less washed out and help give you a more youthful glow.

ADVERTISEMENT

5. Use thin layers.

I wear A LOT of makeup. A lot. Many layers, in fact. Yet, people always comment on how lovely my skin looks. 

The trick with this though is to make those layers thin. 

If you're doing the right skin prep and using an illuminating primer, you'll tend to find you can use much thinner layers, as your skin won’t need so much product. 

Remember, you can always add more if you need to — and it's much easier to add product than it is to remove it when you've used too much.

6. Use setting spray between layers.

This is a tip for multiple reasons. Firstly, it will help to lock in hydration as you add more product. Secondly, if you're using cream-based formulas, it'll also give you a more seamless finish, while giving you more time to blend your products before they 'set'. 

I like to spray my face with a setting spray after applying my base and powder (yes, I use powder — pretty much every damn day — but remember rule number five. Thin layers). This helps to melt the products into my skin, creating a more natural glow. 

I also apply a final layer of setting spray to my face — give it a real good soak — and fan it down to dry. 

To show you the difference, here's what my skin looks like before and after setting spray:

Before setting spray (left). After setting spray (right). Image: Supplied.

ADVERTISEMENT

It'll give you the best glow. Period.

Just make sure you do this BEFORE mascara. 

7. Use a primer NOT a concealer on your eyelids.

As always, makeup is very much 'you do you' — but these are different products for a reason. 

Eye primers are designed to control the natural oils produced by your eyelids and to prevent creasing. Concealers, on the other hand do not. If you want longevity in your shadows, then invest in a primer. 

ADVERTISEMENT

Eye primer. Image: Supplied.

Even if you don't tend to wear eyeshadow when you're doing your makeup, a primer will still serve to cover specific skin concerns like redness, veins and darkness in your eyes. It's a real MVP.

8. Create a false socket.

If you have hooded eyes  — and let's face it, as we age a lot of parts start to sag  — you might want to open up your eyes a bit more by creating a false socket.  

ADVERTISEMENT

The easiest way to do this is to not look at your eyelid as your crease. Use your upper orbital bone as a guide and push the end of a makeup brush just under it while looking straight ahead into a mirror. 

This is where your crease actually is. Apply your transition shade here looking straight ahead and it will change your eyeshadow game. 

The biggest mistake we all make is not taking our eyeshadow high enough, so don't be afraid to do this!

9. Frame your features.

This is sort of an all-encompassing statement. We frame our picture when we put them on display don’t we? We need to do the same with our face. 

Bronzer, blush and highlighter, aside from creating warmth and luminosity, bring dimension back into our faces and enhance our features. 

Image: Supplied.

ADVERTISEMENT

Bringing in that theory, you should never neglect your brows. 

I know I'm lucky to have a pretty good set of brows but even if yours are quite light and sparse — define them. Groom them. They don’t need to be too thick or heavy.

Trust me, this will really elevate your overall look and enhance anything you do with your eyes.

10. Blend, blend, blend and then blend some more.

One of the biggest comments I get is on my eyeshadow look. And to be honest, you’re never going to get a seamless blend in a quick two minutes. It takes some time, but it shouldn't take forever either. Tools are key here. 

Get yourself some different sized fluffy blending brushes. Once you pack on your colour and blend out slightly, start to 'tickle' around the edges with a clean brush. This will give a softer, diffused and airbrushed look to your eyeshadow. 

Clean the brush off every now and then if needed. 

Image: Supplied.

ADVERTISEMENT

When you think you’ve done enough, go a bit longer and with lighter pressure each time. You are essentially colouring in your eyelids. The further out from the centre of the colour you go, the lighter the pressure you need to use. 

Remember, don’t grip your brush near the base, hold it past the halfway point of the handle for the best application results. 

Once you have completely finished your makeup, take a final glance and see if you need to lightly do one last past with your blending brush. 

ADVERTISEMENT

You don’t have to do these steps every day if you're time poor but if you want to step up your normal makeup look, just give yourself a few extra minutes each day. You'll be amazed at the difference it can make to your look. 

Image: Supplied

So, there you have it! 

Looking for the exact makeup products I used for the above look? Say no more. I've popped them below:

ADVERTISEMENT

Image: Supplied

Want to hear more from Teresa? Check out her articles here or follow her on Instagram.

Do you have any makeup tips you'd like to share? We'd love to hear them! Comment below.

Feature image: Supplied/Canva.

Calling All Australian Women! We want to hear from you in this skincare survey. Complete it now and go in the running to win one of four $100 gift vouchers!