beauty

'I'm a makeup artist. Here's how I get my skin looking like glass.'

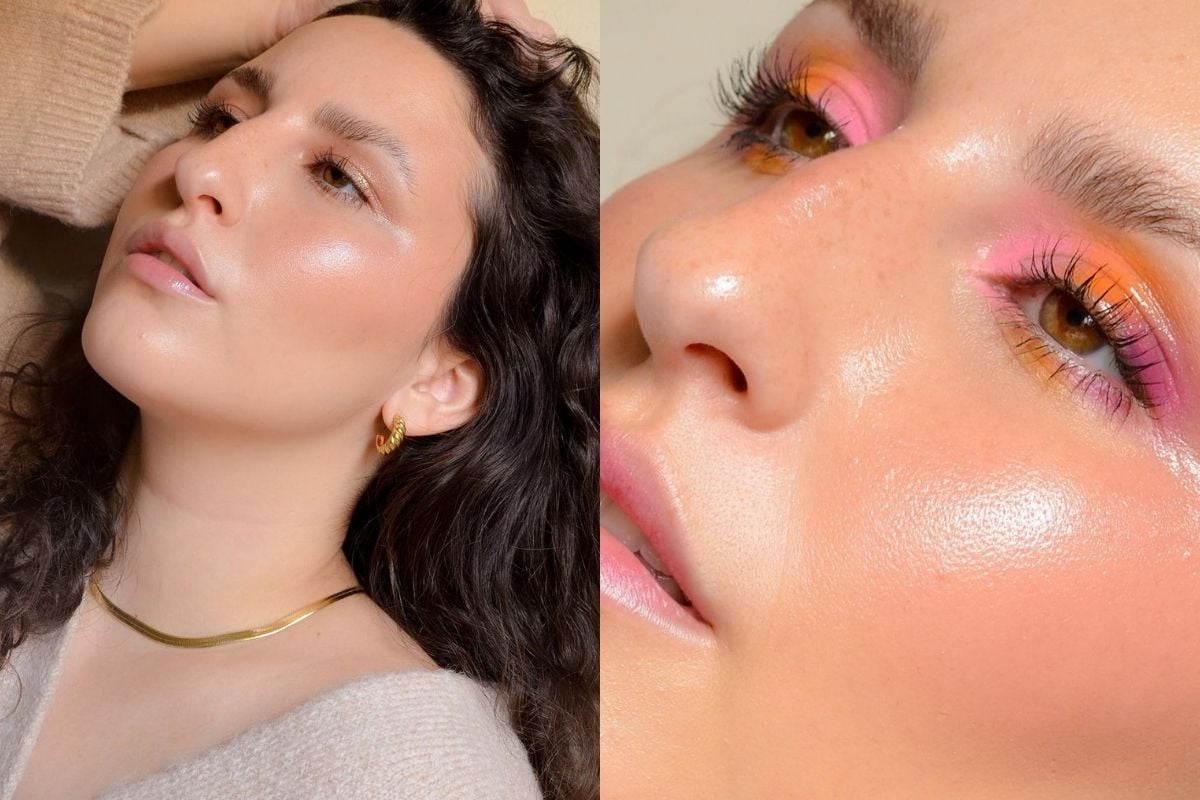
Hello! I’m Clary, and I’m addicted to really juicy skin. My skin is super dry, and skin that looks like skin but *juicy* and glassy is where I like to be. 

Watch: 'I tried the lube makeup trick. And the results kinda surprised me.' Post continues below.


Video via Mamamia

Glow is achieved in thin layers with the help of the right products, so where do we even start when picking the right steps and products?

1. Skin prep.

So often I will get DMs or clients asking me, “What is the best foundation to achieve juicy skin?, or “I have dry skin, what is the best glowy foundation?”

Fun fact: Your initial glow shouldn’t come from your makeup - it should come from skincare layers underneath your foundation. With the right skincare, you can turn ANY foundation into a glowy foundation.

With skin prep, I focus on addressing hydration in a couple of formulas - a serum (usually a hyaluronic acid kind of serum), a facial oil (I find this to be the real key to the glow), a moisturiser and SPF (if it’s daytime). In that order! 

We get told often that oil has to come after moisturiser, but it is actually absolutely fine for it to go before moisturiser. Of course, you can tweak this formula to fit your skin's needs.
ADVERTISEMENT

If your skin is not hydrated enough under makeup, your skin kind of eats up the makeup you’ve put on top (you know your skin is doing this if it sort of patches off and/or disappears throughout the day or looks kind of chunky/crusty in areas). 

Your skin should not be relying on your makeup for things that your skincare needs to provide.

My skin is quite dry, so I love a good hydration routine. Some of my current favourite skin prep products are:

2. Base.

Now that skin is bouncy and juicy and serving glazed donut realness, we can get into makeup deets. 

Most foundations/tinted moisturisers should now glide on like a glowy dream considering all our hard work skin prepping (unless you are putting on the most matte foundation). 

If you’re having a long day/night, you could also use a primer for that *extra* longevity. 

My current go-to products for my base are:

In terms of application, primer can go on like a moisturiser or with a buffing brush across the face. With foundations/tints, I like to dot them across the face so that way you know how much product is going on the face (I call this the foundation Dalmatian). 

When buffing it away, I love brushes like the Hourglass Number 2 Brush, $93, Flower Beauty Powder Brush, $14, Mecca Maxima Flat Foundation Brush, $14, or the new Mecca Cosmetica Double-Ended Complexion Brush, $48. 

ADVERTISEMENT

With my concealer, I’ll usually do a little line where my under eyes are the darkest and blend it out with a sponge in an outwards motion.

3. Cream products.

In my opinion, the way to get a long-lasting glow is to address hydration glow (through skin prep) and then a ‘fake' glow that emulates hydration glow once the skin prep sinks in throughout the day (through makeup). My favourite way to achieve this so-called fake glow is through cream and liquid products.

Cream products add that extra bit of juice that we love, and they’re super simple to apply. Some of my favourites are:

Bronzer: Mecca Max Off Duty Stick, $18 (I wear the shade 'Medium'), Anastasia Beverly Hills Cream Bronzer, $55 (I wear the shade 'Amber'), Nudestix Nudies Matte All Over Face Color Blush & Bronze, $49 (I like the shade 'Terracotta Tan') and Makeup By Mario Soft Sculpt Shaping Stick, $43 (I wear the shade 'Light-Medium').

Cream blush: Mecca Max Off Duty Blush Stick, $18, Stila Convertible Colours, $37, Nudestix Nudies Bloom All Over Dewy Color Blush, $49, Ere Perez Carrot Pots, $40, Rose Inc Blush Divine Radiant Lip & Cheek Color, $45.

Liquid blush: Milk Makeup Bionic Blushes, $34, Charlotte Tilbury Blush Wands, $60, Rare Beauty Soft Pinch Liquid Blush, $34.

Highlighter: Mecca Max Off Duty Stick, $18 in shade 'Glass', Danessa Myricks Dew Balms, $22, Kevyn Aucoin Glass Glow, $39.60, Ciate London Dewy Bronze Stick, $43, Nudestix Glow All Over Face Highlight, $49.88, in 'Ice Ice Baby'.

ADVERTISEMENT

There are two ways to apply cream products. One, directly apply them on the face and then blend them out with a buffing brush. 

Two, swipe a little product on your buffing brush and then blend it out onto your skin. 

Either way is absolutely fine!

4. Powder.

Now, something that truly changed the game for me, especially on long long days/nights is tactical powdering. 

Tactical powdering is when we very gently place powder in sections we don’t want to look as juicy, while we keep other sections powder-less. 

The wrong powder can truly make or break tactical powdering, the trick is to find a powder that isn’t too matte, but more of a velvety satin finish. 

My current setting powder faves are:

Application for this step is quite key, as we don’t want to move around all the gorgeous blending we have achieved. We want to press/stipple a small amount of the powder onto the desired area (like the chin, sides of the nose or forehead). 

I like to use a brush like the Mecca Cosmetica Double Ended Perfecting Brush, $48. 

5. Optional: Extra longevity.

Sometimes more is more right? Long day/night? Adding a touch of powder bronzer and/or blush helps keep things in place. But again, it’s all about which products we pick that help not mattify all our hard dewy work.

ADVERTISEMENT

With the application, ensure that we use a very light hand (as cream can tend to grab onto pigment layered on top). 

I would use the same brush as we did in the previous step and either swirl the product gently on the cheek, or stipple it on. We want to ensure that we aren’t powdering the highlighting area, as we love the juicy vibes over there. 

What I love about all the layering we’ve done, is that the skin should be nice and fresh and glowy still, even though we've added powder! 

Product recommendations for this step:

Whoops! I think I overdid it with powder!

That’s okay, all hope is not lost! A trusty setting mist can soften the powder and bring the glow back.

Some of my faves are:

All you have to do is spray it from about 30cm away from your face and then fan yourself afterwards. 

Want to see the makeup steps in action? Below are some glowy, juicy makeup looks I’ve achieved with these products.

ADVERTISEMENT
ADVERTISEMENT

And voila! You are a glowy angel!

Have you used any of the above products before? Share with us in the comment section below.

Feature image: Supplied/Clary Riven

Want to win a $50 gift voucher? Complete this survey now to go in the running!