beauty

‘A makeup artist showed me 7 ways to switch up my 'boring' look. Here's what I learnt.'

Okay, confession time. Gather around. For someone who lives and breathes beauty, I'm notoriously... boring with my makeup look

I have a simple, tight and uncomplicated makeup routine with a small slew of products that are quick and easy to use. There's always lots of brown, beige, and neutral colours going on, a bit of a liquid wing situation...

I know, I know.

It's boring. And it makes doing makeup feel like another 'thing' I have to do, rather than that fun and exciting thing I want to do. Because that's what makeup should be!

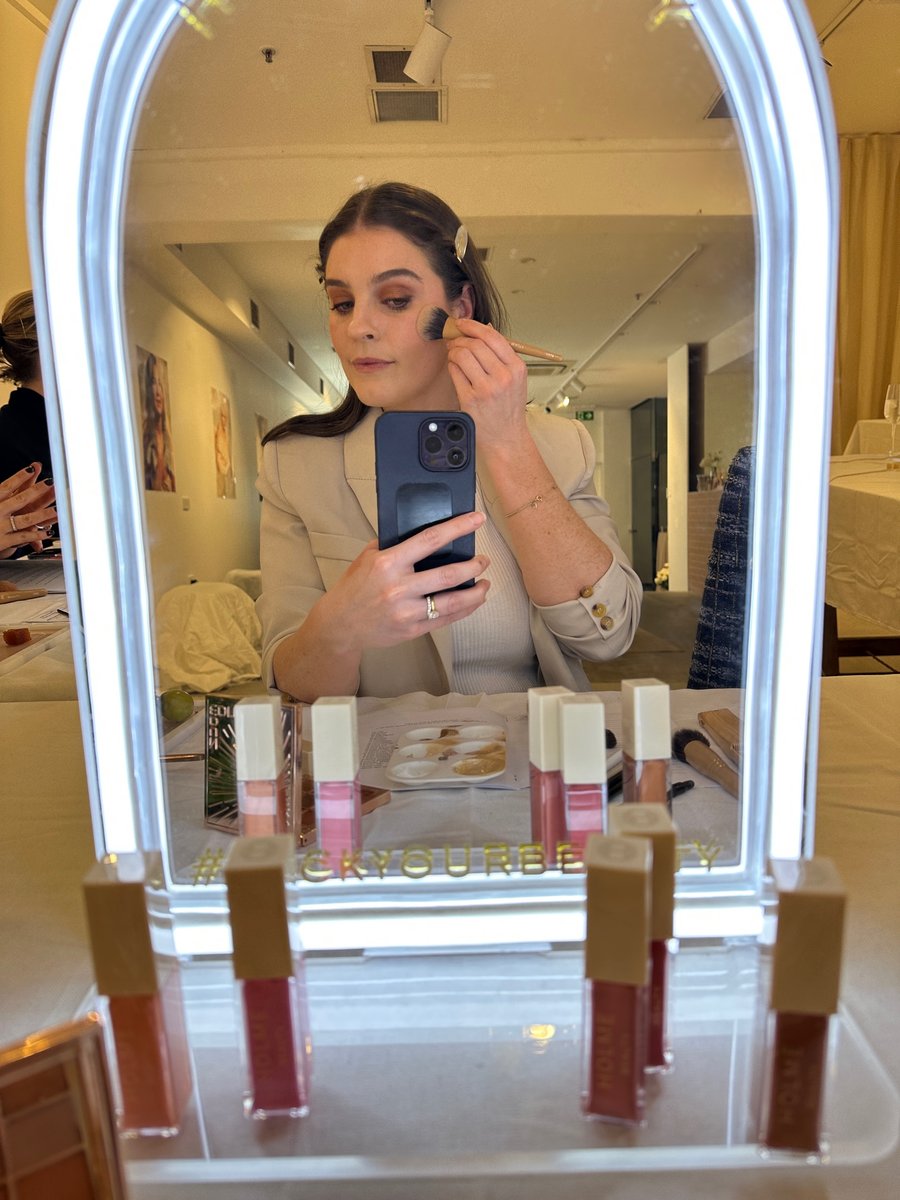
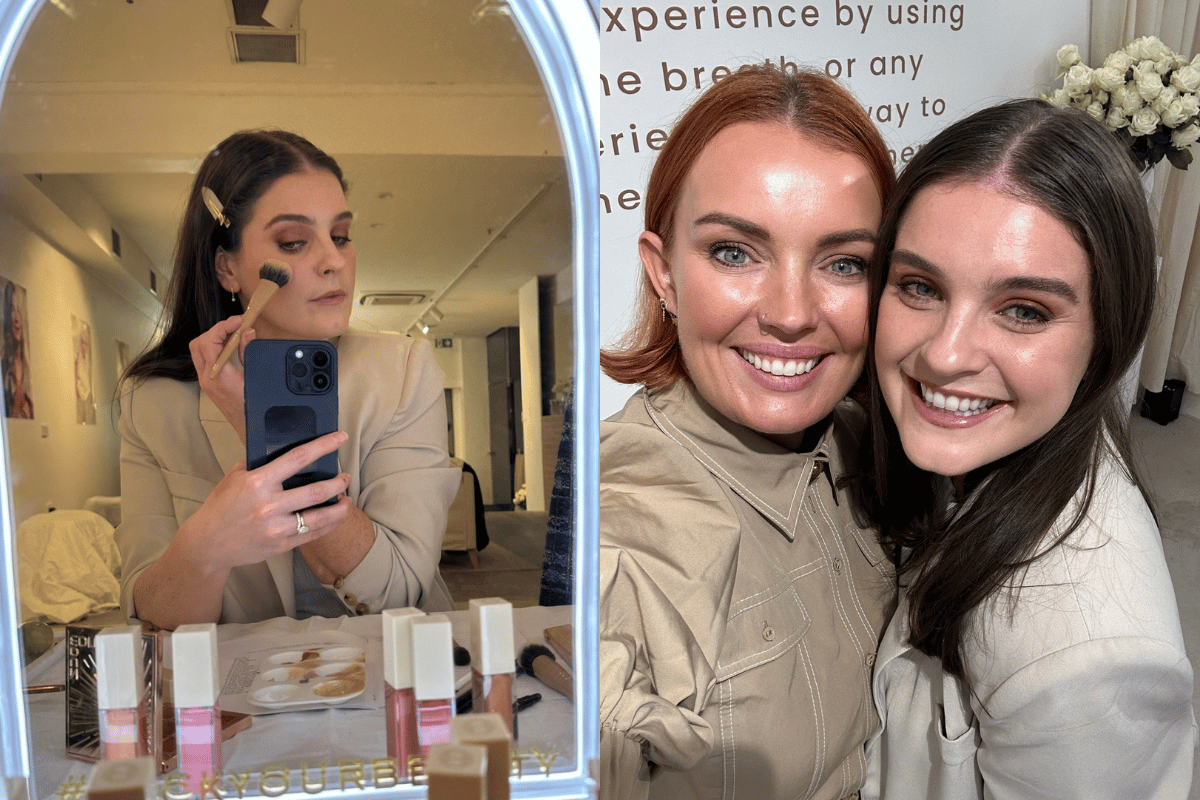
So when I was offered the chance to sit in on a makeup masterclass with none other than makeup artist Hilary Holmes (the wizard behind popular makeup brand Holmes Beauty), you're going to bet I said YES PLS.

Watch: Speaking of makeup tips, bridal makeup artist Natalie Wright teaches us her techniques for a smokey eye with a twist... there's no black eyeshadow in sight. Post continues below.


Video via Mamamia

Now, I've never been to a makeup masterclass before. And I just assumed it would be a room full of people who were quite new to the whole makeup thing. 

ADVERTISEMENT

But, as it turned out, there were a bunch of beauty editors, along with some actual makeup artists, all there to brush up on their makeup skills. Meaning? There's ALWAYS something to learn.

And goodness, there were soooo many good tips. I can't even remember them all/have time to write them all down.

What was that? Of course I'm going to share some of them with you! Don't be silly.

Here are the tips that've made the biggest difference to my routine so far.

1. Always start with your eyes.

I used to do this back when I used powder eyeshadow, but reverted back to doing my base first after I started using mostly cream products.

However, according to Hilary, this rule still applies if you're looking to keep your makeup seamless and non-smudgy around the under-eye area — because no matter what kind of formula you're working with, you'll inevitably end up with flakes of mascara and smudges of colour that you'll have to go back and fix up, etc.

Also, by starting with your eyes first you'll probably use less concealer and foundation to cover it all up. 

Win-win!

2. Your eye shape is important.

I write about face shapes/eye shapes/brow shapes in reference to makeup and beauty all the time, but have never actually... considered... my own? Confusing, I know.

ADVERTISEMENT

But knowing what kind of eye shape you have is really quite useful when it comes to accentuating your eyes with makeup.

While there's obviously a load of different eye shapes, almond-shaped eyes and round-shaped ones are some of the most common, and they often get confused. 

But according to Hilary, there's one simple trick to figure it out. She said to look at the end of your lash line — if it drops downwards, you have round eyes. If it goes straight out, you have almond eyes. 

Insanely simple.

I discovered I had a round eye shape. In terms of the most flattering eye look, Hilary suggested smudging eyeliner on the top and lower lash line (I would usually stop halfway, but she said it could go right into the inner corners, which was ultimately terrifying) blending the line out and up on the outer corner of the eye (kind of like a winged effect). 

I also took Hilary's advice and added a bit of shimmer in the middle of my eyelid to make it pop. And it did. Genius.

If you're trying to figure out your eye shape, head here.

3. Don't be afraid to bend above the crease line.

I'm always scared I'll look too 'intense' if I apply eyeshadow above my crease line. But as Hilary showed us, the trick is all in the tools and the technique (you need to blend, blend, blend!).

Also, for a lot of people, your eye look ends up fairly hidden when you open your eyes — especially if you're part of the hooded lids squad. So, stretching the colour above the crease line can help give it a bit more dimension and depth.

ADVERTISEMENT

And if you feel like you've over-blended at any point and the shadow is too dark, Hilary said to simply pick up a clean, fluffy brush and blend it out.

4. You're probably contouring wrong for your face shape.

And by 'you', I mean 'me'. Because as it turns out, I've spent, like, 15 years contouring my face wrong. 

How awkward.

While I've always gone by the... standard... face mapping for contouring and creating shadows, it's not really a one-size-fits-all kind of deal.

Image: Supplied

ADVERTISEMENT

Take, for example, my forehead. Turns out it's smaller than I thought. So the way I was contouring it, was actually making it appear even... smaller. 

Coolcoolcool.

Instead of contouring around my temples and hairline, Hilary suggested drawing a vertical line from the middle of my brow up to my hairline to extend this area. Pretty neat, huh? 

If you want to figure out your face shape, and the best way to contour your cute features read this.

5. Blush can transform your makeup look.

If you've never really been a blush girl because you always thought it looks 'too much', the good news is that blush has come a long way. 

Better yet, these days the range of cream blushes on the market makes wearing blush versatile and subtle. These kinds of next-generation formulas melt into your skin and foundation seamlessly making your skin look glowing and healthy rather than overly made-up.

(Psst... Holme Beauty has just launched a new blush - hence the whole masterclass thing!).

6. Dry skin can and should use powder.

As someone with the moisture level of an actual lizard, powder makeup is something I try — nay, REFUSE — to put on my face. It always ends up going patchy and flaky and feels gross. Over the years, I've concluded that base powder just isn't for dry skin.

ADVERTISEMENT

But, according to Hilary, everyone can use face powder — dry skin included. You just need to find the right one for your skin type and do the heavy lifting when it comes to skin prep (skincare and a hydration-giving primer). Once you do these things, there's one other thing that's really going to smooth things out and stop it from looking cakey...

7. Always go ham with setting spray.

If you're not on board with setting spray yet, it's time to jump on in friend. Because, according to Hilary, a heavy spritz of setting spray to the face not only sets your makeup but melts everything together beautifully for a healthy, glowing, skin-like makeup look.

And I don't mean a couple of light sprays — I'm talking a solid soaking (makeup artist and over 50s content creator Terresa McNamara swears by it, too!). To finish, stipple it all in with a beauty blender or brush.

And there you have it! Seven makeup tips that've helped pull me out of a makeup rut.

Want to hear more beauty ramblings from Erin Docherty? You can follow her on Instagram.

What's your go-to makeup look? Share some of your tips with us in the comment section below.

Feature image: Erin Docherty/Supplied.

Calling all Homeowners! Complete this short survey now and go in the running to win one of four $50 gift vouchers!