
How to contour: Natural, non-stripy looking contour with your fingers in 4 easy steps.
ADVERTISEMENT
If you’re here because you want to learn how to contour then friend, you’ve come to the right place.
ADVERTISEMENT
Despite how the Kardashians make it seem, contouring isn’t the easiest of makeup techniques to master.
Sure, contouring your face the right way can give you the raised cheekbones and sculpted jaw of one of Michelangelo’s angles. But do it wrong, and your contour could end up looking like you’ve a) smeared poop on your face, or b) got a big, orange stripe on your cheeks.
Fun.
So, what is contouring and how do you apply it so it looks like your natural cheekbones, but better?
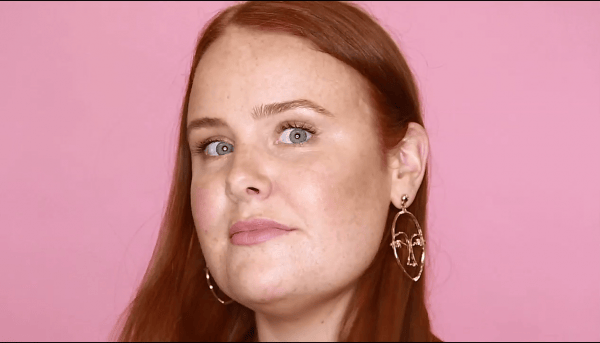
Keep scrolling for our simple how to contour tutorial with Melbourne-based celebrity makeup artist Monica Gingold. The best bit? You can do it with your fingers in just four steps. (You can watch exactly how Monica contoured my mug in the video below, full step-by-step continues after video.)
What is contouring?
Social media might have you thinking contouring involves painting illuminati symbols all over your face in brown makeup, but as Monica told Mamamia, good contouring is actually the opposite.
ADVERTISEMENT
“Contouring is about creating the illusion of a shadow, giving shape and definition to the face,” she said.
“The rule is: if you can see your contour, you’ve done too much. It’s not actually about seeing it, contour should look like your natural skin and face.”
How to contour.
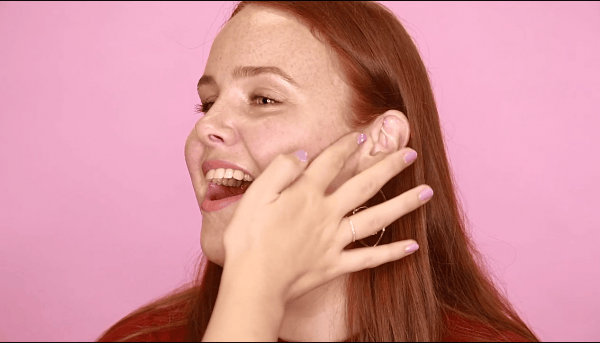
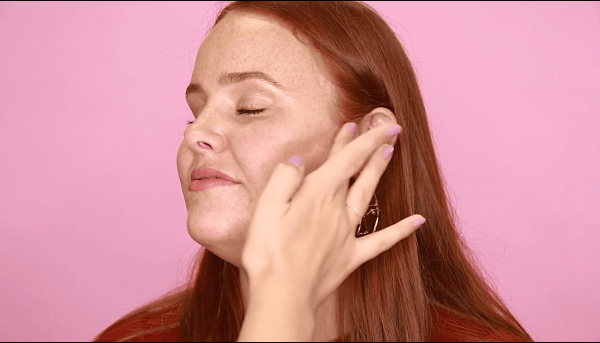
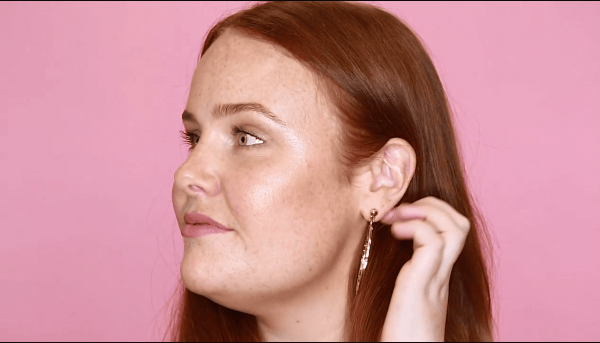
Step 1: Find the right spot along your cheekbone.
ADVERTISEMENT
Monica said, "To find the actual bone, feel between where your ear and cheekbone are, and if you open your mouth a bit, you're going to put the contour in the spot where you can feel movement."
Whatever you do, don't do a duck face and apply contour in the hallow part of your cheeks.
"Please, no duck face. What happens when you duck face is it actually pulls the skin, and your contour will end up in the wrong place."
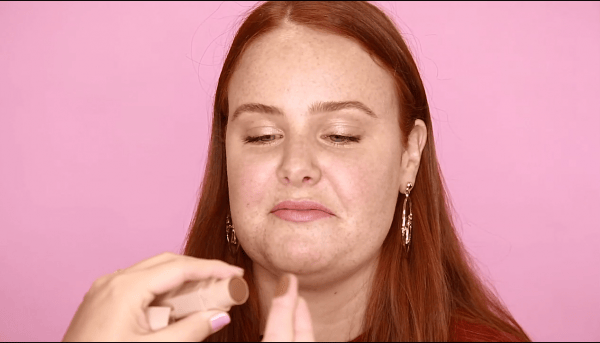
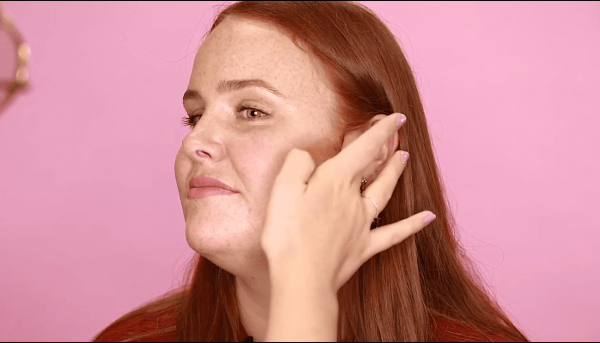
Step 2: Transfer the contour product onto your finger.
ADVERTISEMENT
Rather than drawing your cream contour product (you can try a contour stick or a cream contour in a palette) directly onto the skin, Monica recommends applying the product onto your finger first,
"I always take the product on my finger, the warmth of your skin with make the product easier to use, and just to check how much product I've got, I dab a bit on my hand. That way, I know that when I touch the face, the colour isn't going to be too much or not enough."
ADVERTISEMENT
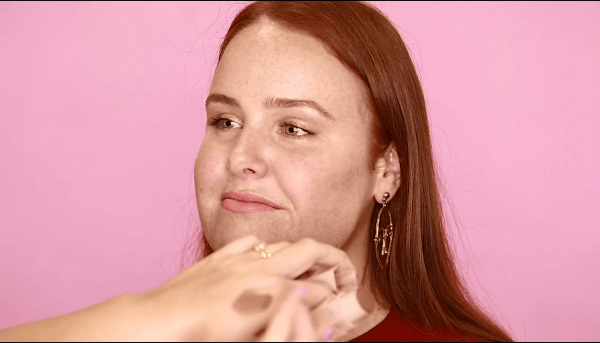
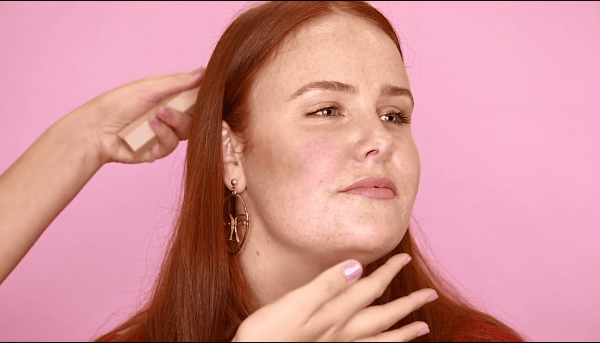
Step 3: Pat the contour product into the skin using your finger.
ADVERTISEMENT
ADVERTISEMENT
Next, you're going to want to dab, dab, dab (not the dance move) and pat, pat, pat.
"Pat the product onto the face. It won't leave much product on the skin, but you only want a little bit. I find if you draw the product on straight from the stick, it'll definitely be too much, and if you put it in the wrong spot or too much on, it's hard to blend it away," Monica said.
"Don't do a stripe or swiping motions with your finger, you really want to pat it into the skin, and blend up and down."
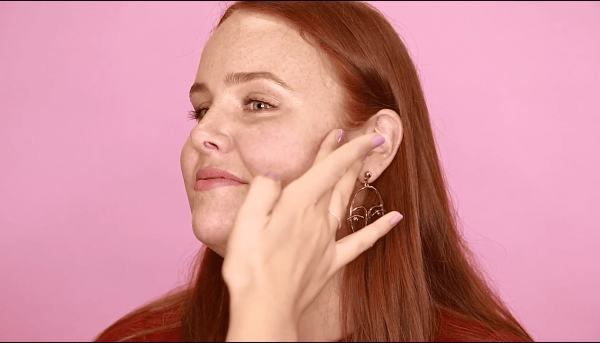
Step 4: Blend the contour product upwards.
ADVERTISEMENT
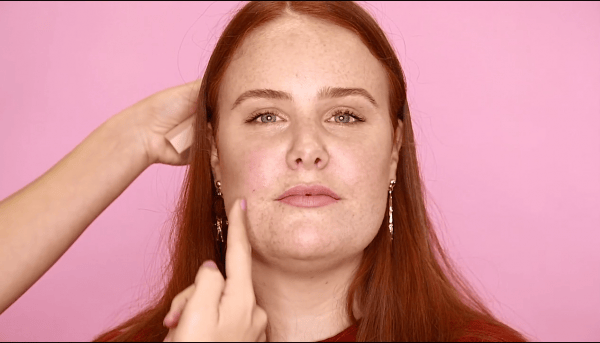
Finally, the key to a good contour is blending.
Monica added, "You want to gradually pat and blend the product upwards and downwards, and go all the way up to where the hair is around your ear, otherwise you'll end up with a white patch."
ADVERTISEMENT
"The contour shouldn't go further forward than the outer corner of the eye. You want to keep the fullness of the apples of your cheeks as that's what makes you look young and glowy."
ADVERTISEMENT
Et voila! Cheers to a natural-looking contour that adds definition to your face.
Have you tried contouring before? Tell us about your makeup tips in the comments below.
For more epic, no BS beauty advice, get Mamamia's beauty podcast You Beauty in your ears. It's a blast.
Love all things beauty? Come join our You Beauty Facebook group for more chit chat about things to put on your face. And body. And hair.
Want more beauty content? Visit our newsletter page and sign up to "You Beauty" to get beauty guru Leigh Campbell's tips and products every week in your inbox (see one of her newsletters here).
Tags: