beauty

The tips this hair colourist swears by for better DIY results.

Solfine
Thanks to our brand partner, Solfine

Whether it’s to save money (we’re looking at you, cost-of-living crisis), time, or just because you love doing things yourself, colouring hair at home has come a long way in recent years. 

But there are certain things you need to do to get hair that looks exxy but has cost less than a work lunch out.  

Luckily for you, we’ve asked the questions for you. Now, with the right products and these pro tips, you’ll be sashaying out of your own bathroom with colour so fresh it’ll look like you had it done at the salon. 

Start with the end in mind

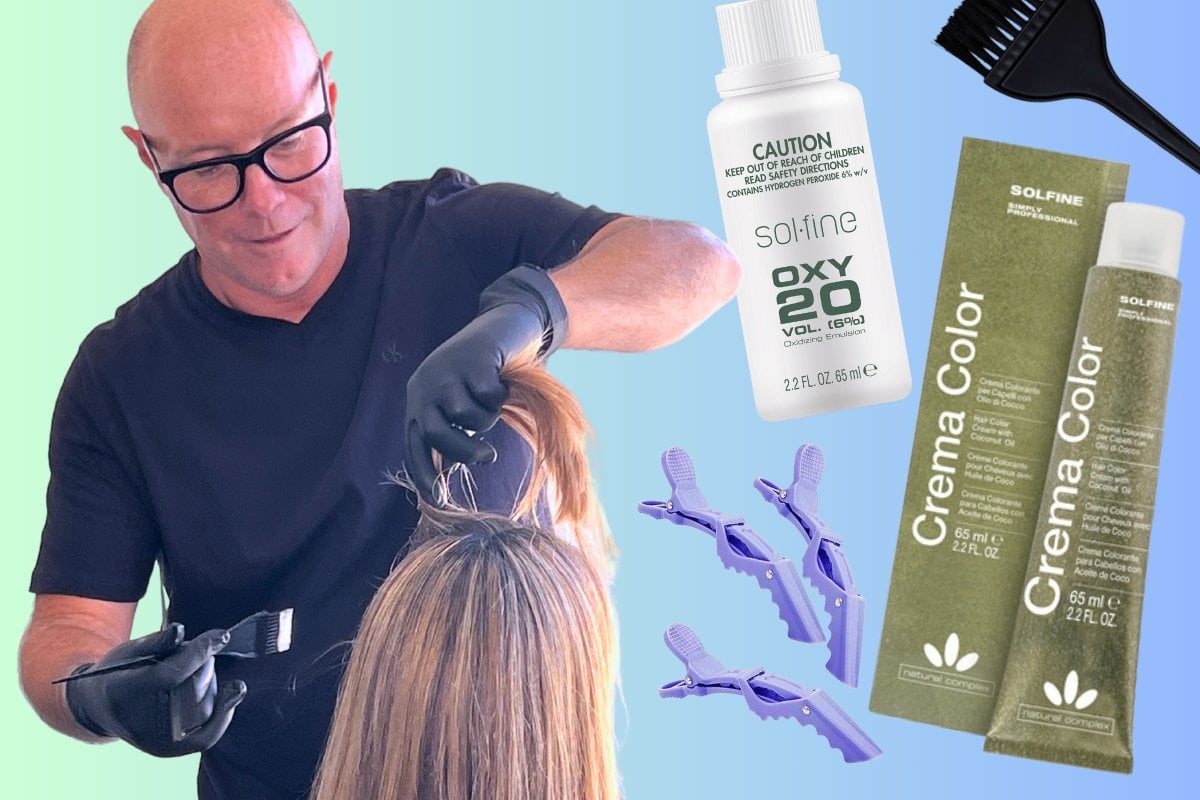
A key component of getting that post-salon shine at home is picking a product that does two things: “It needs to achieve the colour you want but also ensure that the hair is in the most beautiful, pristine condition during the colouring process,” says Duncan Richards, qualified hairdresser and National Education Manager AUS/NZ for Solfine Crema Color.

“If you can protect hair during that process, the colour can last longer and the hair can be shinier and healthier for the life of the colour.”

Duncan recommends Solfine Crema Color’s new formula with organic ingredients for the job. The high-quality Italian brand, available at Priceline, features “hyaluronic acid, which absorbs into the hair and offers nourishing and moisturising benefits. Coconut oil, which gives the hair malleability and extra shine. And helichrysum and flax, which have amazing antioxidant properties to ensure your colour doesn’t fade as quickly,” says Duncan.

ADVERTISEMENT


Next, let’s talk colour

If the colour you're planning includes highlights or going dramatically lighter, Duncan recommends heading into the salon. For everything else, keep on reading.

“For the best colour results, keep within one to two levels – or shades – of your natural colour to start with, whether that be just a little bit lighter or a little bit deeper, or staying on the same level if you want to cover greys,” says Duncan. “Anything outside of that colour range will be difficult for you to achieve at home.”

ADVERTISEMENT

A caveat: if you already have colour through your hair, and you want to go lighter, Duncan warns that “colour won't lighten colour”. “So if you are looking to go lighter, you will need a bleaching product or something along those lines to lift and lighten your hair.” In which case, defer to the pros, so you don’t fry your tresses or end up with a weird burnt orange that looks nothing like the swatch on the box.

Set up like a pro

Like all great colourists – as you will be by the time you get through this article – you need the right tools. Duncan says this includes bowls, brushes (a smaller one for around your hairline to help with accuracy, and a wider one to speed up application through the crown and the top back of your head), a comb, clips, gloves and old towels. Clothing-wise, he recommends an old shirt that buttons up at the front, so you don’t have to awkwardly pull clothing over your freshly coloured hair at the end. 

If you’re worried about the telltale marks of the hair colour on your skin, Duncan suggests putting a little conditioner around your hairline before applying colour to dilute the colour from staining. Also, do a strand test before committing to ensure you’re happy with the colour. 

The best hair to colour? “Day-old, dry unwashed hair is best and make sure the hair is free from styling products,” Duncan suggests.

The secrets for equal coverage

Once you’ve mixed your colour as per the instructions, it’s time for the application.

ADVERTISEMENT

“Section your hair in four parts. Start by sectioning hair from the middle of the front hairline straight down to the nape of the neck, and then make another section from ear to ear,” says Duncan.

“From there take small partings, like a spiderweb, working from one section across to the other and apply it back up in small areas. Make sure you continue with the pattern. Stick with the section you're working with until you get it all done, clean up any product on the skin with a slightly damp cloth, and then work on your next section,” Duncan says. 

If you have stubborn greys, start your application in the area that has the most greys, as Duncan says, “This will give the area maximum processing time to really penetrate the hair shaft for excellent coverage.”

Getting those tricky to reach spots

The closest we’ll get to having eyes in the back of our heads while we colour is by cleverly setting up a second mirror to help us see what we’re doing. 

“For example, you could have a small mirror that's reflecting onto a larger mirror behind you,” Duncan says. If that’s not doable in your space, the key to colouring the back of your head accurately is by working small sections at a time. 

“The best way to do this is by not getting too much colour on your brush. If you only slightly dip the brush in, that way when it touches the scalp, you know you’re only colouring just that little amount at the regrowth area.”

Speaking of regrowth…

It’s super-important to not overlap your previous colour (oops, guilty). 

ADVERTISEMENT

“The number one rule is colour on colour goes darker. So, even if you're applying a slightly lighter colour, it will go darker. 

“Secondly, you are putting another application of product on hair which has already been sensitised from colour, that can make the hair drier,” says Duncan.

So what do you do if your colour has faded towards the ends and needs a little love? Duncan recommends this: “Mist the hair with a little water and then work any leftover colour through to the ends for the last 10 minutes to refresh your colour.” Easy!

Before you jump in the shower

Here’s another thing we wished we’d known about at-home colouring years ago: “Before you rinse your hair, with your gloves, get a little bit of the colour and emulsify that colour into itself as colour lifts colour,” Duncan says. This helps avoid any streaks and removes any staining. 

Next shampoo (if it’s part of the instructions as is with Sofine Crema Color) and condition. “I always recommend breaking up the shampoo in the palms first, then emulsifying it into the different areas of your hair. Once you've rinsed, the conditioner will help really seal that cuticle and lock the colour in for you.”

And there you have it! At-home salon-quality hair colour without the price tag.

Shop Solfine Crema Color range online or in-store at Priceline Pharmacy. 

Feature Image: Supplied/Priceline/Solfine/Getty.

Solfine
Salon Professional, italian-made hair colour for you at home, conveniently @pricelineau now with Hyaluronic Acid, Coconut Oil and botanical extracts from organic agriculture (Helichrysum and Flax extracts). The celebrated Solfine Crema Color formula has now been enriched with ingredients that enhance its colouring efficacy while improving hair protection, for a richer and longer-lasting colour result. Your favourite, hair colour secret weapon just got an upgrade! Follow 4 easy steps to select your personal shade and developer in-store at Priceline (or online if you already know your fav shade!).